2D Lighting Tribulations with Shaders

I see. So the “higher colors” like the bright lights will be preserved but just toned down to 0-1. I’m guessing it preserves the vibrance somehow but I’ll just see what it looks like when I get home from work.

I see in the second example you’re raising the color to a power, I can grasp what you are actually doing. It’s the “coming up with that” part that we’d be lost at.

Good to know about the dark colors not getting much darker, it makes sense given what kind of math is actually happening. As long as the vibrance produced by the HDR in the first place is preserved, it all works out, I guess.

Is the color range for HDR 0-2.0f, or can color values higher than this end up in the FBO textures?

No, I just didn’t want to bother to write out any higher values. xD You should use 16-bit float textures as 32-bit float textures are waaaay too slow. The maximum representable value for 16-bit float (AKA half precision) is 65504. Although you only have about 3 decimals of precision, it’s way more than enough to represent colors as we don’t have much error buildup. In practice there shouldn’t be any difference at all between 16-bit and 32-bit floats when used as render targets that are cleared each frame.
If you go over 65504 though you might end up on the “infinity” value. If this happens, your bloom blur will blur out infinity (=more infinity), and you’ll get pretty funny images. Basically try to keep your values below 1000. Shouldn’t be a problem at all if you’re used to having values around 1. ;D
Fun fact 2: You can have negative values in float textures. Negative bloom, anyone? xD

So I guess since the HDR modifies the proportions of everything on the screen to look glowy and bright, as long as we are using a decent formula for this we will just get better contrast and a nicer looking final result, even if we push the colors back under 1.0, since they are scaled a certain way now.

So… I get that we’re rendering our images to a RGBA16F target. What I don’t really get is: the color information for my textures/lights/etc. are stored based on the 0-1 range, becase this is what I’m used to being restricted to when calling glColor4f. How does having HDR enabled allow me to circumvent this limitation? Using a higher max value than 1, for the gl_FragColor in the light rendering? Or, for sprites, when we import our textures with the texture loader they are all RGBA8.

UPDATE:

This is what I achieved with the first tone mapping formula. I see what you mean by putting whatever tonemapping algorithm I could find, and then call your one liner at the end. See the update below. It definitely looks nice and smooth and still gets the point across, it eliminates that crazy HDR glow (which could look nice for explosions or effects, not sure if bloom will take care of that). Is this the right track? I know with tonemapping the point is to get everything under 1.0 color but given how cool full HDR display can look, I can’t help feeling weird about the result. We’ll see what happens when shadows are done.

UPDATE 2:

So I’m using this cute little fragment shader.


uniform sampler2D sampler;
varying vec2 tex_coord;

// Control exposure with this value
uniform float exposure;
// Max bright
uniform float brightMax;

void main()
{
    vec4 color = texture2D(sampler, tex_coord);
    // Perform tone-mapping
    float Y = dot(vec4(0.30, 0.59, 0.11, 0), color);
    float YD = exposure * (exposure/brightMax + 1.0) / (exposure + 1.0);
    color *= YD;
    gl_FragColor = color / (color + 1);
    //gl_FragColor = color;
}

Found this in a PDF. The original shader doesn’t do your trick of normalizing everything to [0,1], and everything is still all vibrant, the higher the exposure relative to the max brightness, the more vibrant everything looks. When I use your line, everything is obviously reduced to [0,1] due to the nature of the equation but everything is smoothed out nicely.

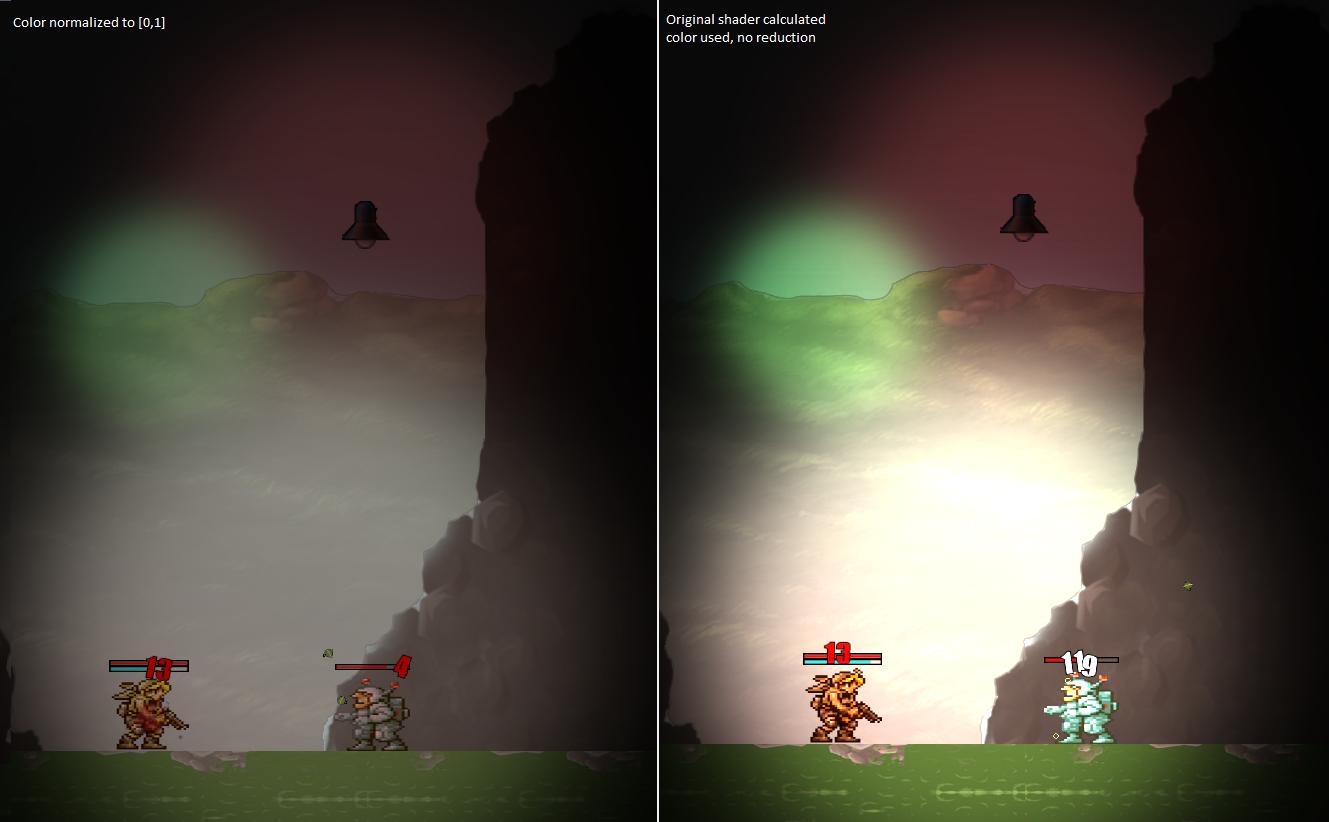
Is the intent of bloom to “fill back in” the lost “vibrance” that we lose when we standardize everything to [0,1]? Because without the unlimited color things look somewhat boring, I assume bloom’s intent is to spruce things up a bit. Here’s an example with this shader’s exposure var set to .4f, and the brightMax to 1.5f, screenshot on left is with your code enabled, screenshot on the right is using their tone mapping shader with no [0, 1] normalization of the color.

Based on what you’ve told me, the point of the tone mapping step is to get everything into [0,1] to prepare for bloom. I’m assuming that by blurring the lit scene and drawing it on top of itself, we’ll artificially add ‘bloomy brightness’ back to the scene, and the dull look of the left screenshot will go away. Please confirm/deny :slight_smile: I’m just confused now, apparently tone mapping happens after bloom which means if we are converting everything back to LDR, we’ll lose the vibrance. Unless I’m missing something here

HDR just allows you to have values over 1.0 stored on the graphics card. There is no way to display that information exactly on a computer monitor as no monitors or TVs have the contrast/brightness to display it, or even a way to send the floating point data to them. You will have to convert everything to LDR to be able to display it. How you do this is however a HUGE topic.
There are way too many tone mapping algorithms out there, and there is no perfect one as this is something that doesn’t happen IRL. The only real criteria for a good tone mapping algorithm is that it looks good, e.g. reinforces the style of the game. You complain about dull colors, but in a horror game this might be desirable. You’re just not using the right tone mapper for what you want.
Small note: You don’t HAVE to keep the fragColor = color / (color + 1); line. There are other ways to tone map your values, that just happens to be the simplest one. A tone mapper doesn’t even have to map the every color from 0 to 65000 to [0-1], as long as you’re okay with the clamping to 1. Like I said, forget about “real” tone mapping and go with something that looks good for your game.

I believe that the tone mapping fragment shader you posted is meant to have another feature along it to keep values in the displayable range (0-1): dynamic exposure. As the exposure is an uniform variable, it is possible to change the exposure on the fly. You can either calculate the average luminance of the last frame (like a real camera or your eye) and adjust the exposure based on that value, or have different exposure values for different areas in your game. For example if your character enters a cave or some other dark place, you can increase the exposure as it’s most likely gonna be darker in there. Both of these methods will give you the extremely awesome effect of being blinded by light when you get out of the dark place and into sunlight. The point of such a tone mapper isn’t to map every possible color to [0-1], but to map the most common range of colors to [0-1]. If there are clamping of colors darker or brighter than that, it’ll still feel and look natural, as that is more how things look in real life. Personally I don’t think dynamically calculating the exposure would be a very good idea in a 2D game you are more likely to have both very dark and very bright objects on the screen at the same time, and they would both be hard to see. Let’s go with the cave example again: Your character might be inside the cave, but the outside might still cover a large part of the screen, which would make the cave extremely dark due to the exposure being low. I would do it some other way to actually adjust the exposure to what is important to show.

Again, there is nothing forcing you to use my color / (color + 1) line. Just use what looks good.

So where does bloom come in? I posted this a long time ago:

For a more concrete example, go out a sunny day and look at the sun (well, not for too long though xD). Even though the sun is just a small circle in the sky, its light still covers your whole field of view making it very hard to see anything. As your screen won’t be able to blind you with light like that even if you draw something with extremely high HDR colors, you’ll have to simulate this yourself. This is called the bloom effect/filter in games.
I said before that you should apply bloom before tone mapping. This is also just a matter of preference. If you use a very simple tone mapper (which you at the moment definitely aren’t) this is the case, as bright objects will always be bright. If you however change the exposure (= multiply the colors by a value) in some way, I would do things in this order:

renderStuff();
applyExposureToBackbuffer();
applyBloom();
toneMap();

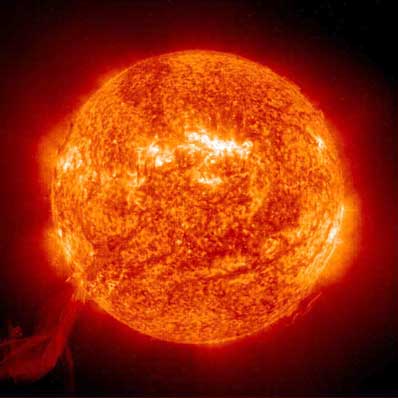
Let’s go back to a my sun example again. Take a look at this foto:

To take this kind of foto, one would use an extremely low exposure time. Is there much “bloom”? Some, but it’s not enough to render the details impossible to see. Bloom should obviously be applied AFTER exposure.

(But it might also make perfect sense to apply bloom after tone mapping in some special cases where you have a very different tone mapping algorithm, for example a linear one.)

Oh, almost forgot:
glColor4f isn’t clamped to 0-1 if you’ve called GL30.glClampColor(GL30.GL_CLAMP_VERTEX_COLOR, GL11.GL_FALSE); (or the corresponding ARB function) earlier, so feel free to supply higher values than 1.0 to it.
gl_FragColor isn’t clamped if you’ve called GL30.glClampColor(GL30.GL_CLAMP_FRAGMENT_COLOR, GL11.GL_FALSE);
Concerning your sprites and any other RGB8 textures you may use: while they will of course only be able to hold [0-1] values, feel free to scale them in any way you want using glColor4f. Even though they have lower precision than your HDR, it shouldn’t be noticeable at all due to lighting, linear filtering (if you use it) and tone mapping. You could use float textures for your sprites too, but that would require the sprite source images to actually be HDR too. Just don’t. It’ll look fine. Do you see any color banding or bad gradients related to the textures in your game? Many 3D games even use RGB8 textures, as the higher than 1 values will appear after lighting, especially specular lighting.

And an important final note: Forget about the color 1 being “bright”. There is absolutely nothing wrong with having a light that is brighter than 10.

[quote]HDR just allows you to have values over 1.0 stored on the graphics card. There is no way to display that information exactly on a computer monitor as no monitors or TVs have the contrast/brightness to display it, or even a way to send the floating point data to them. You will have to convert everything to LDR to be able to display it.
[/quote]
I kind of get this, but I can’t wrap my head around how I can achieve that insane vibrance (when I don’t use an equation that gets the values under 1 again) and actually have it be displayed on the monitor, if this is true. It just feels like if I bring everything under one, I’m again capped by the sprite’s native color. With a tone mapping function that brings everything in line with [0,1], there isn’t a way to avoid being restricted by the texture’s native color. You then go on to say, however:

[quote]Both of these methods will give you the extremely awesome effect of being blinded by light when you get out of the dark place and into sunlight. The point of such a tone mapper isn’t to map every possible color to [0-1], but to map the most common range of colors to [0-1]. If there are clamping of colors darker or brighter than that, it’ll still feel and look natural, as that is more how things look in real life.
[/quote]
So here we have an example of a tone mapper that doesn’t quite map everything to 0,1; assuming that they are left above 1 (as can clearly be seen in the picture). So is the point not to necessarily get everything to [0,1], but to apply a scaling function to the colors on the screen to ensure the best possible display on an LDR screen? Does this mean that the graphics card/OpenGL does “something” to the colors that are still higher than 1 at render time, to make them displayable? This is the only way for me to rationalize what is going on, because obviously they’re being displayed, and obviously the vibrance is being retained.

Is the exposure in this case just a flat multiplier to the colors in the backbuffer? i.e. a camera’s exposure is just letting more light come in before closing the shutter. The bright spots get brighter by a larger amount than the dark spots because more light is coming into the lens every second.

[quote]Concerning your sprites and any other RGB8 textures you may use: while they will of course only be able to hold [0-1] values, feel free to scale them in any way you want using glColor4f. Even though they have lower precision than your HDR, it shouldn’t be noticeable at all due to lighting, linear filtering (if you use it) and tone mapping.
[/quote]
This is good to know. This should solve the problem of having to change to additive blending when I am rendering a sprite that I want to flash white. I am still sort of stuck in the mentality that anything related to glColor must be locked into [0,1] but I guess I’ll just have to slowly get over this.

Status update on the lighting project: We have everything working correctly with multiple HDR textures, shadow geometry is being drawn (albeit in immediate mode, we still don’t quite get how to do otherwise), and all is fine up until bloom. I’m applying a darkening shader (to remove dark spots) by setting some arbitrary color threshold (say, 1.5 pre-tonemapping), and just doing fragColor = color-threshold, and colors that are below the threshold will simply go to zero (do they actually go negative?). Unfortunately, when I do this for the bloom filter I and enable additive blending, the rest of the scene still ends up black somehow (where the non-bright spots are). I think the problem might be my function, because if I can have negative colors stored on my GPU, and I’m using additive blending, I’m actually subtracting color from the dark areas when I add the bloom map to the scene.

Multitexturing is also causing me a bit of a headache. I don’t really know what GLSL version we’re using, but instead of texCoord2D[0], I have to do this weird somewhat hacky way of making a vec2 called tex_coord0, 1, whatever, in my vertex shader, and use that in my Texture2D call along with the sampler. I also have no idea what a uniform sampler2D is, and why it feels like sometimes I need to pass it in from the application and other times openGL just magically knows what that variable is.

I’ve tried glActiveTexture(GL_TEXTURE0), glActiveTexture(GL_TEXTURE1) before each call to bindTexture, so that my shader sees all three textures. So far no luck. I’m not even sure what the final gl_FragColor would be, would it just be the three bloom maps added together? Even though all three textures are a different size, I’m drawing them on top of the same quad (the scene) so it shouldn’t matter.

+100 internets for your post. Thanks again.

Glad to see things clearing up!

[quote]So here we have an example of a tone mapper that doesn’t quite map everything to 0,1; assuming that they are left above 1 (as can clearly be seen in the picture). So is the point not to necessarily get everything to [0,1], but to apply a scaling function to the colors on the screen to ensure the best possible display on an LDR screen? Does this mean that the graphics card/OpenGL does “something” to the colors that are still higher than 1 at render time, to make them displayable? This is the only way for me to rationalize what is going on, because obviously they’re being displayed, and obviously the vibrance is being retained.
[/quote]
No, nothing fancy happens. When you finally write to the LDR backbuffer, they will just be clamped to [0-1]. This isn’t as bad as it might seem though.

[quote]Is the exposure in this case just a flat multiplier to the colors in the backbuffer? i.e. a camera’s exposure is just letting more light come in before closing the shutter. The bright spots get brighter by a larger amount than the dark spots because more light is coming into the lens every second.
[/quote]
Yes, exposure is just a multiplier. The combination of exposure and bloom will give quite nice results. If you want to see the dark details in a scene, you have to increase the shutter time (e.g. the exposure), but if you have something bright, you’ll just get a very bright image as the bright part blooms over the whole screen. It’s just like a real camera! =D

[quote]This should solve the problem of having to change to additive blending when I am rendering a sprite that I want to flash white.
[/quote]
Indeed, just draw it with glColor3f set to a high value, maybe (10, 10, 10) or so, or just draw it with an alpha of 10, as that would just multiply each color with 10, giving the exact same result. xd

[quote]I am still sort of stuck in the mentality that anything related to glColor must be locked into [0,1] but I guess I’ll just have to slowly get over this.
[/quote]
Get over it, man! You’re too good for LDR!

[quote]Status update on the lighting project: We have everything working correctly with multiple HDR textures, shadow geometry is being drawn (albeit in immediate mode, we still don’t quite get how to do otherwise), and all is fine up until bloom. I’m applying a darkening shader (to remove dark spots) by setting some arbitrary color threshold (say, 1.5 pre-tonemapping), and just doing fragColor = color-threshold, and colors that are below the threshold will simply go to zero (do they actually go negative?). Unfortunately, when I do this for the bloom filter I and enable additive blending, the rest of the scene still ends up black somehow (where the non-bright spots are). I think the problem might be my function, because if I can have negative colors stored on my GPU, and I’m using additive blending, I’m actually subtracting color from the dark areas when I add the bloom map to the scene.
[/quote]
Bwahahahaha! Yes, floats can be negative… xD Ahahahahaha…!
You need to clamp each color channel to 0, but doing it manually would be stupid. Just use the built-in max() function to clamp each channel individually and fast!

gl_FragColor = max( texture2D(sampler, gl_TexCoord[0]) - threshold, vec4(0, 0, 0, 0));

[quote]Multitexturing is also causing me a bit of a headache. I don’t really know what GLSL version we’re using, but instead of texCoord2D[0], I have to do this weird somewhat hacky way of making a vec2 called tex_coord0, 1, whatever, in my vertex shader, and use that in my Texture2D call along with the sampler. I also have no idea what a uniform sampler2D is, and why it feels like sometimes I need to pass it in from the application and other times openGL just magically knows what that variable is.
[/quote]
Yes, in the latest GLSL versions all non-essential built-in variables have been removed. The only ones that are left are the really necessary ones, like gl_Position and gl_PointSize in vertex shaders. Even gl_FragColor/Data have been removed and have to be replaced manually! I think this is good, as you’ll just have the ones you need.
It is pretty rare to have more than 1 texture coordinates. Mostly you’re sampling the same place on 2+ textures (texture mapping + normal mapping + specular mapping for example), so there is no need for 2+ texture coordinates as they will be identical. If you’re sampling from two way different textures, like a color texture and a light map, you will however need 2 texture coordinates.

[quote]I’ve tried glActiveTexture(GL_TEXTURE0), glActiveTexture(GL_TEXTURE1) before each call to bindTexture, so that my shader sees all three textures. So far no luck. I’m not even sure what the final gl_FragColor would be, would it just be the three bloom maps added together? Even though all three textures are a different size, I’m drawing them on top of the same quad (the scene) so it shouldn’t matter.
[/quote]
You might want to call glEnable(GL_TEXTURE_2D); on each active texture unit, but I 99.9% sure you don’t have to when you use shaders.
The reason why single texturing works is that the samplers default to 0 (obviously), so all samplers are automatically bound to the first texture unit on shader compilation. If you want to sample from multiple textures you need to set the samplers manually with glUniformi() to different texture units (that’s 0, 1, 2, 3, etc, NOT texture IDs!!!).

Really, all the twisted fixed functionality was driving me crazy, so I just started working solely with OpenGL 3.0. Sure, it’s a lot more code to get a single triangle on the screen, but it’s much faster and more elegant for anything more advanced than that. No more glEnable crap exploding all the time! Okay, glEnable(GL_BLEND) but that doesn’t count! T_T

[quote]+100 internets for your post. Thanks again.
[/quote]
Jeez, thanks! I’m gonna hang them on my wall! ;D

EDIT: I forgot one thing. You were complaining about your colors not being vibrant. In this awesome article on tone mapping there was a comment in which one of them complained about his colors not being vibrant. He also linked(/made?) this article: http://imdoingitwrong.wordpress.com/2010/08/19/why-reinhard-desaturates-my-blacks-3/ It seems very interesting and relevant. Just look at the screenshots!

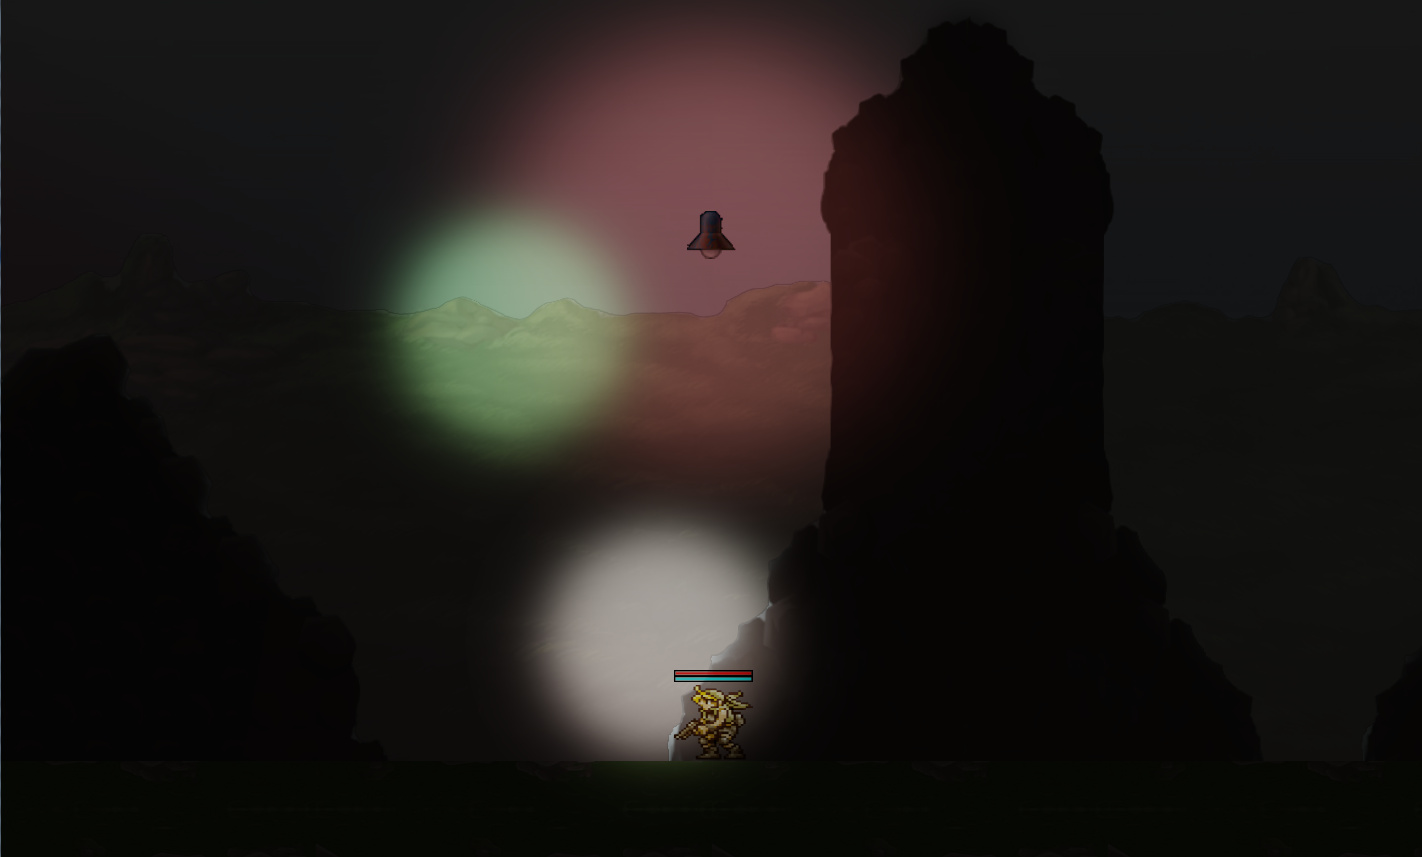
[quote]I forgot one thing. You were complaining about your colors not being vibrant. In this awesome article on tone mapping there was a comment in which one of them complained about his colors not being vibrant. He also linked(/made?) this article: http://imdoingitwrong.wordpress.com/2010/08/19/why-reinhard-desaturates-my-blacks-3/ It seems very interesting and relevant. Just look at the screenshots!
[/quote]
Damn. This suddenly makes everything seem a lot more logical. I don’t quite understand luminance of a pixel but this is definitely helping me to understand what’s going on under the hood of the shader we’re implementing. It’s preserving the saturation by converting it into the equivalent LDR colors per pixel. Unless I’m crazy or something. It’s probably a bit more complicated but I haven’t gotten to read thoroughly.

When I get home and have time to read what you wrote about multitexturing in a single shader I’ll hopefully be able to post with good results… we’ll see. It’s not very intuitive and most examples I find are just GLSL and completely assume that your application code is going to be 100% correct (binding the right textures in the right order and passing the correct unifs). As far as converting to 3.0 code, we’re shooting for just getting this to work on what we understand instead of trying to implement 4 new technologies at once and then not be sure what’s screwing us over. Optimize later, and all that. But hopefully it’s not too much more of a headache before we have something good.

I believe the reason for colors looking “washed out” is that most tone mappers apply their function per channel. All the tone mappers I’ve posted so far apply a non-linear function to each color channel; R, G, and B. That means that the tone mapping will change the actual color, as the color will change non-linearly.
Now what does that do in practice?
Let’s say we use the simple tone mapper fragColor = color / (color + 1). We have the color (5, 0, 10). This would be some kind of dark purple, right? However, after tone mapping we get:

(5, 0, 10) -> (5/6, 0/1, 10/11) = (0.833, 0, 0.91)

We suddenly end up with something that looks a lot more like magenta than a bluish purple! The ratio between red and blue (originally 5:10 = 1:2) has changed a lot, as it is now about 1 : 1.15!
This tone mapper causes any color to approach white as the brightness increases. In practice, this means it grays/whites out everything, e.g. you lose color vibrancy. This is however similar to camera film IRL, but you shouldn’t care about filmic tone mappers for games, especially if you do it in 2D and use sprites. Instead use a tone mapper that better preserves the ratio between the colors. The article I linked proposes calculating the luminancy (Exact same thing as converting the color to gray scale), tone map the luminance and finally scale the colors by this tone mapped luminance. This would preserve the RGB ratio, and might be exactly what you want. I think an approach like this would be better for a sprite based 2D game.

EDIT:
I seem to have ****ed up the URLs in my earlier post, so I’ll just do this the easy way:
Good article on tone mapping: http://filmicgames.com/archives/75
Better colors from tone mapping: http://imdoingitwrong.wordpress.com/2010/08/19/why-reinhard-desaturates-my-blacks-3/

[quote]The article I linked proposes calculating the luminancy (Exact same thing as converting the color to gray scale), tone map the luminance and finally scale the colors by this tone mapped luminance. This would preserve the RGB ratio, and might be exactly what you want. I think an approach like this would be better for a sprite based 2D game.
[/quote]
This makes a lot of sense, and now I am seeing the pixel shader I found in a new light (the original one handles bloom and the tone mapping together, I took out the bloom multiplication and do it separately):

There’s that intensity vector that figures out the grayscale luminance. There’s… a problem though… where does it ever use the vector Y again? It seems like the creator put that in there and then just never uses it unless there’s something about GLSL that I’m missing. So the steps needed would be to multiply the Y vector by the YD tone mapping and then reverse the conversion to make that color the final fragment color. I have no idea if this would work.

Upon further examination, it looks like this function IS indeed the Reinhard operator. The difference is that brightMax is not squared in this equation (easy enough). The shader I have here doesn’t seem to make use of the calculated float Y, which seems to be important in preserving the color ratios by using luminance instead. In the second to last example in the second link where he loses all his whites, he translates his color to grayscale, applies the color/color+1, then translates back to normal. However in his final example he uses the Reinhard operator ON THE LUMINANCE-SCALED color, then changes it back.

If my shader is already doing this somehow, I’m not sure why it’s not more evident in the code (since the value Y doesn’t seem to be doing much of anything).

You’re right, it’s not doing anything with the Y variable. There’s also something very wrong with the YD line. Currently it calculates a value only based on exposure and brightMax. This will obviously be constant unless you change the exposure/brightMax manually. Right now it’s just scaling the colors by a simple value. Definately wrong. I’m almost certain that this is how it should be:

uniform sampler2D sampler;
varying vec2 tex_coord;
 
// Control exposure with this value
uniform float exposure;
// Max bright
uniform float brightMax;
 
void main()
{
    vec4 color = texture2D(sampler, tex_coord);
    // Perform tone-mapping
    float Y = dot(vec4(0.30, 0.59, 0.11, 0), color);
    float YD = exposure * (Y/brightMax + 1.0) / (Y + 1.0);
    color *= YD;
    gl_FragColor = color;
}

It… It… It just makes sense…
EDIT: Oh, wait, it doesn’t.
Why not just remove brightMax, multiply Y by exposure and replace YD with

float YD = Y / (Y+1);

? That would probably work fine.

I’d like to challenge this and propose that the correct function is this:

float YD = Y* (Y/brightMax^2 + 1.0) / (Y + 1.0);

The exposure, as I understand it, is just a scale factor. In fact if you look at the tonemapping operator in the second article you linked me, towards the bottom, it’s this:

http://s0.wp.com/latex.php?latex=L_d(x%2C+y)+%3D+\frac{L(x%2Cy)\left(1%2B\frac{L(x%2Cy)}{L^2_{white}}\right)}{1+%2B+L(x%2Cy)}+&bg=ffffff&fg=555555&s=2

No where in here does it say anything about exposure. Not really sure where you’d multiply in the exposure if this is the case but it definitely seems like it’s using L(x,y) in all three places in the equation (where we’re using Y, the luminance). It seems like if we wanted to use “exposure” we’d have to multiply that into the original color. Seems like something you’d want to play with, but for some reason, only having L(x,y), Y, or whatever you want to call it in two of the three spots doesn’t feel right when taken in the context of this article.

Maybe your way with just multiplying the entire thing through by the exposure would work, I don’t know. He also uses something like:


double L = dot(vec3(0.2126, 0.7152, 0.0722), color);
double nL = ToneMap(L);
double scale = nL / L;
color *= scale;
gl_FragColor = color;

Where his L is our Y, and ToneMap(L) returns our YD. The division of nL / L seems to be the inverse of what he’s doing in the first line, to get the correct ratios to modify the original color by. I’m not sure where in this process you’d apply exposure, assuming the my modified YD calculation is correct. Additionally the luminance vector he uses is different than the one I found originally but I’m assuming this is just going to result in a slightly different outcome and is a matter of preference.

EDIT: Double post, please delete

I reread the article, and that formula is only for tone mapping the luminance value. It should be complimented by this code:

double L = 0.2126 * R + 0.7152 * G + 0.0722 * B;
double nL = ToneMap(L);
double scale = nL / L;
R *= scale;
G *= scale;
B *= scale;

This one doesn’t have any exposure variable though. I thinky you’re meant to control the exposure indirectly through the brightMax uniform.

uniform sampler2D sampler;
varying vec2 tex_coord;

// Max bright
uniform float brightMax;

float toneMap(float luminance){
    //This is the function in the article
    return luminance * ( 1 + luminance / (brightMax*brightMax)) / (1 + luminance);
}
  
void main()
{
    vec4 color = texture2D(sampler, tex_coord);
    // Perform tone-mapping
    float luminance = dot(vec4(0.30, 0.59, 0.11, 0), color);
    float toneMappedLuminance = toneMap(luminance);
    gl_FragColor = color * toneMappedLuminance;
}

WARNING: PROGRAMMED IN POST.
Probably lots of errors.

I think this would be the tone mapper used in the article.

Yep, looks like we basically came to the same conclusion. This seems pretty solid if it works as advertised. Can’t wait to test it out. I guess if you wanted a really bright scene you’d just up brightmax (coming out of the cave, etc).

Nonono, brightMax defines the LOWEST value that will be mapped to 1.0 on the screen. If you increase brightMax, the whole scene will get darker! You’d want to reduce brightMax in caves. It’s like inverse exposure (if I got this right).

Oh oh oh I see. Yeah, I remember now actually. When I had the exposure as a uniform along with brightMax, the brightness of the scene would be dependant on exposure relative to brightMax (exposure being a higher percentage of brightMax would result in a brighter scene.

I like this better because it more accurately reflects what’s actually happening and if I want a way to control exposure directly I can just put that somewhere else. Doing the exposure within the luminance modification tonemap func just seems wrong, since the exposure is a scale of the actual HDR color, not of the color ratios, if I’m thinking about it right.

Yes, I agree. I also don’t know how to implement bloom with this. You can’t apply it before the tone mapping, as that would make bright objects overbloomed, regardless of exposure/brightMax. You might be able to after tone mapping as it doesn’t reduce all colors to LDR (if a pixels luminance is over brightMax, it should get over 1), but I don’t know how that would look. You also wouldn’t be able to tone map the bloom. Once again, I have no idea how that would look. I have to sleep now though so no more posting today… I’ll try this tone mapper tomorrow.

Good night and thanks. I think applying the bloom last in this case wouldn’t necessarily be terrible as long as you don’t go overboard with the bloom effect… I’ll play around with it. If the bloom ends up being too intense with this method, could you blend the bloom in with an alpha < 1 so that it didn’t overpower the image? I also think if you set your threshold for capturing which parts of the screen should be bloomed, you can still collect only the brightest of bright spots for the gaussian shader. Again I’ll spend tonight tweaking this and post with my results.

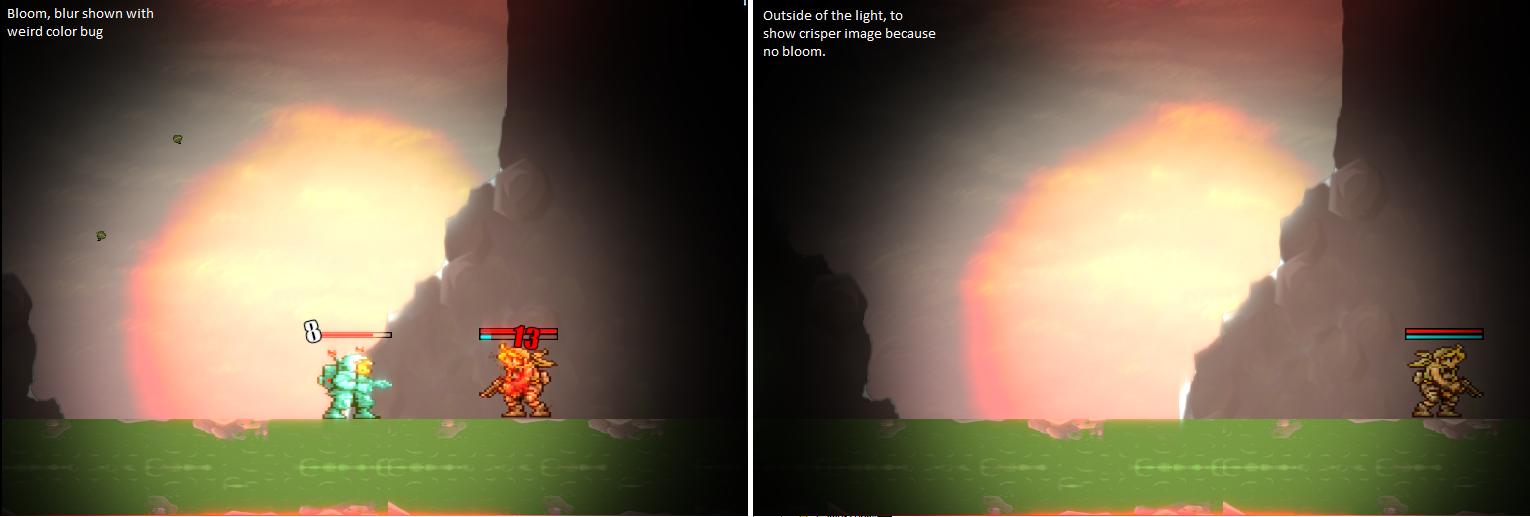
EDIT: Fixed the darkener, using three passes for stacking on the bloom right now (still having problems with passing multitexture).

Weird red effect is due to the fact that the center of the light is extremely bright and the darkness filter isn’t 100% perfect. You basically set one uniform that is the threshold ignored by the darkener, that is bloomed 3 times with downsampling, and smacked onto the scene with additive blending. It’s pretty quick and dirty. This effect is a little extreme and I doubt there’d be something like this in game except for the ‘coming out of cave’ example. I ended up with a modified version of the tone mapping shader we discussed earlier that actually converted the luminance back onto the color vector before passing.


uniform sampler2D sampler;
varying vec2 tex_coord;
 
// Max bright
uniform float bThresh;
 
float toneMap(float luminance){
    //This is the function in the article
    return luminance * ( 1 + luminance / (bThresh*bThresh)) / (1 + luminance);
}
   
void main()
{
    vec4 color = texture2D(sampler, tex_coord);
    float L = dot(vec4(0.2126, 0.7152, 0.0722, 0), color);
    float nL = toneMap(L);
    float scale = nL / L;
    gl_FragColor = color * scale;
}

Using a combination of our code and the article’s. Everything can be tweaked. Darkness threshold, maxBright, the intensities and colors of lights, you name it. There are a ton of variables so it’s a lot of trial and error to get something that looks nice but I think we are definitely on the right train of thought. How bloom is going to interact with shadows for very bright lights is impossible to say at this point.

Oh, jeez. Sorry, I forgot the scale part!!! My code quality is equal to the inverse of the time since I woke up. Your one is obviously correct! I’ll try it out and post my results after school…

Cool, let me know how it looks.

Yeah based on the intensity of the light, the darkener threshold, and the maxBright param, we get some varied effects. I’ve managed to rig up the demo in such a way that tones down that crazy reddish look quite nicely for the intensity of light we’re using. I’m doing the tonemapping at the very end right before the final render. I forget if this is wrong or right… but I haven’t tried moving the bloom code after the tonemap because I assume then we’d get this ridiculous over-brightness unless we tonemapped again which just seems wrong.