2D Lighting Tribulations with Shaders

You may remember me from my post on brightening a texture. My friend and I have come a long way with our engine since then and are working on dynamic lights and shadows.

We started out with the example given here:


which goes into dynamic soft shadows via creating an alpha texture, rendering a black “ambient darkness” sheet with alpha 1.0f over the scene, and then using the alpha map of your lights to “reveal” through the darkness. Downsides to this system were the lack of our ability to do any kind of bloom effect without shader language, which led us to…


Finally implementing GLSL and GL2.0 compatibility, we explored the possibility of using shader programs for our lights. Currently we have the following simple fragment shader that draws a basic circular light:


varying vec2 pos;
uniform vec4 color;

void main() 
{
    float t = 1.0 - sqrt(pos.x*pos.x + pos.y*pos.y);
    //Enable this line if you want sigmoid function on the light interpolation
    //t = 1.0 / (1.0 + exp(-(t*12.0 - 6.0)));
    gl_FragColor = vec4(color.r, color.g, color.b, color.a) * t;	
}

Which is an example from the youtube video. Using this, we draw the lights to the screen as before, create the alpha map, and then blend this alpha map into our finished scene at the very end.

Again we run into the problem of being unable to add any sort of bloom effect (we assume that this is another type of fragment shader that we would have to pass our lights through), and the idea of how to achieve even “hard” shadows is somewhat of a mystery (save for finding the dot product of the light vector and the normal of the shadow casting surface).

The context of our project: We are developing a 2D indie title that we hope will be as backwards-compatible as possible (I think GL2 is pretty safe). However, having good looking shadows gives a game a great “pop” factor. We are complete strangers to VBOs and FBOs, having used the fixed function pipeline until now. However, we understand the basic purposes of these objects; we’re just lost on implementation and how they might help us arrive at a lighting solution without breaking the rest of our working code.

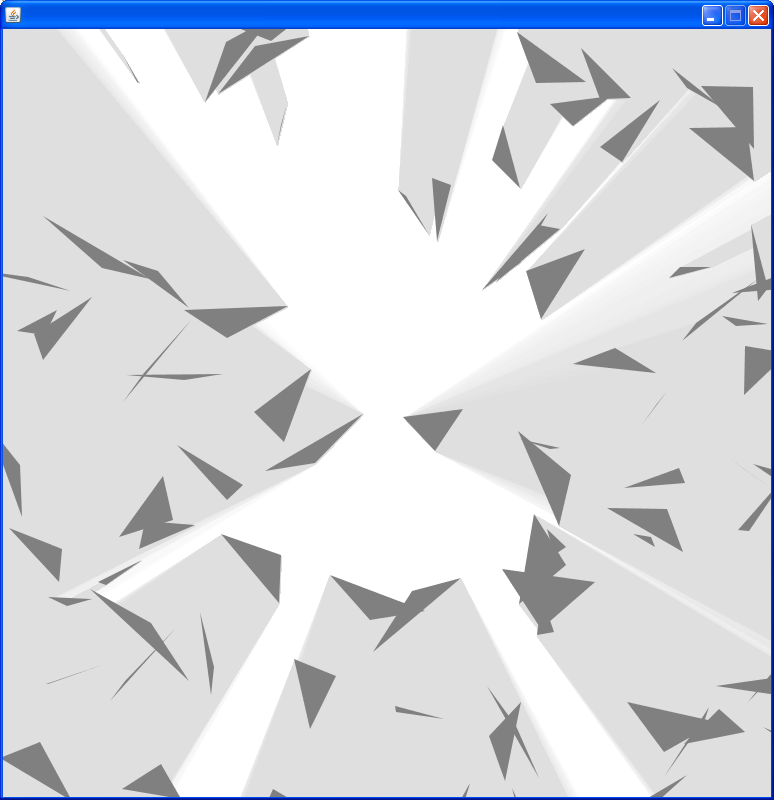
A picture of our current light… uses a shader program, but uses GL_QUADS to actually draw it… kind of a bastardization of GL2, but we’re working on it:

Hopefully you guys see that we have put a decent amount of effort into figuring this out, and aren’t just begging for help. That said, you’re the experts, so any advice would be most appreciated. In return, we can offer a gift… these two droids. Uh, I mean, the two shaders, once we get them working, so that hopefully others can benefit from our combined efforts. If you need any more code from our project in order to help, just ask and I’ll try to dig up something resembling a program.

Thanks in advance!

Awesome, love this kind of stuff! =D
Small tips: Use GL_TRIANGLE_FAN to draw an approximated circle using 16+ vertices around the light instead of a quad. You’ll probably get a quite big performance boost, considering the costly things you do in your fragment shader.

Can you explain how triangle fan is better than a quad when you consider the additional amount of vertices needed to complete a 360 triangle fan, vs. the four vertices used in a quad? Is it that much more efficient due to the fact that we’d only be running the shader on fragments that fall in the approximate circle?

Don’t fall in the trap of premature optimization :cranky:

I can’t tell if this was directed at the poster who made the comment about using triangle fan or at me, nor do I actually know what is more efficient.

The point is that you shouldn’t optimize what isn’t noticibly slow. So you basically shouldn’t care what is fastest. Work on things that matter.

By this logic is it considered a waste of time to invest learning how to use FBOs and VBOs for rendering when the fixed function pipeline works alright for most applications in our project? You’re suggesting running the program later and seeing where bottlenecks are and optimizing then. I like that logic better, particularly for game development.

That being said, any insights into the original post? :slight_smile:

I think creating the shadow-geometry on the CPU is so cheap, you don’t even have to start looking into shaders for shadows.

Quick and dirty way of supporting soft-shadow edges, you can simply render a lot of lights with a slight offset.

I did this in software (drawing shadow triangles in a software rasterizer) and it was ‘fast enough’. It will be about 100x faster on a GPU.


http://indiespot.net/files/shadowmap.png

That looks like a familiar shadow algorithm. :slight_smile:

Your best option is probably to combine your initial shadow generation, but output a per-light shadow texture every frame (a bit like shadowmapping for 3d rendering). Then render this in the world with your fragment shader (at which point you can output your bloom pass).

As Riven says, you don’t want to create the actual shadow geometry on the GPU, it’s be far too slow and the quality wouldn’t be as good.

We thought about including the shadows as part of the lightmap. I’m not entierly convinced that this is the best thing in the world, but maybe. Are there any technical limitations to rendering the light map as a bunch of quads rendered on top of 0,0,0,0 and then stored in a texture, vs. rendering to a frame buffer? If there are actual technical limitations to not using frame buffers we’ll switch for this.

One of the biggest challenges that I just can’t get my head around is what kind of shader we’d have to write. I know we’d figure out the shadow geometry on the CPU and then just render a bunch of quads/blend in the soft edges, but the problem comes when we want to have ambient light.

Example, let’s say we want an ambient scene light of 0.2f,0.2f,0.2f,1f. Where is the correct place in the process to do this? Initially we just cleared the screen to our desired ambient light and used this as the basis for the lightmap, and then blended it in with the scene using GL blend and the pipeline. We’d probably have to use a shader to blend it in given the limitations of the pipeline to go to colors past one. The problem then comes if we render the bloom, and THEN try to draw shadows on top - the shadows would get blended into a color that’s technically supposed to be blocked by the shadows in the first place. ???

Yeah, that’s why you need to do your shadow compositing to a texture first, then clear the screen, draw the scene at ambient light level, and then add each shadow texture on top, then generate the bloom.

Of course you haven’t said how you want to do your bloom - do you want to fake it old-school with a separate render pass, or are you going to do proper HDR rendering with filtering and an exponent? Or multiple render targets? All this depends on what graphics hardware you want to support.

I’ll try to hit all your questions.

First though, “Draw the scene at ambient light level”. We prefer to think of it as ambient darkness, since everything by default is drawn at (1f,1f,1f,1f). Does this mean blending the scene by our darkness color at the end of the render, or applying some sort of filter to every image that is rendered? I think the end result is the same.

The real challenge with bloom is how to make it ignore the shadows. Theoretically a light shouldn’t cast ANY of its light where we have a shadow; instead, only the ambient darkness level should be drawn where the shadow is. i.e. if we have an ambient filter of .2 across the board, shadows should acquire that color, so that everything on the screen except where we have light is drawn at .2.

I don’t really know much about some of the advanced things that you said. I had honestly envisioned making a second pass through my lights and using a shader to force a render past one by being in add mode.

Another problem is if we want to render our scene with an ambient of 0,0,0,0. If we do this at any point other than our lightmap, we are effectively changing our scene to black, rendering any future additions useless. Example: set ambient to black, draw lightmap without ambient light, only added light. Render entire scene at 0,0,0,0… blend in light. Surely you see the problem. The color data of the original scene is now gone.

We don’t really understand frame buffers well enough to use them, but I understand them well enough to know that they are probably the solution here. I just have no idea how to implement.

I think you’re a little confused as to how shaders and lighting passes should be done. For a start you need to stop thinking of light as ‘darkening’ - light is additive and you need to work with it as such to get decent results. It’s also pretty pointless talking about bloom if you don’t know which bloom approach you’re going to use.

What kind of hardware are you targeting? Cutting edge graphics cards? Creaky intel graphics chips? Somewhere in between?

Assuming you’re going for semi-faked HDR, your rough sequence of operations should be:

  1. Generate individual light/shadow textures for each light

2a. Draw scene at bloom ambient level
2b. For each light, draw surrounding geometry modulated by lightmap and bloom colour. Use additive blending to add light to scene.

  1. Capture bloom to texture
  2. Blur bloom

5a. Draw whole scene at ambient light level
5b. For each light, draw surrounding geometry modulated by lightmap. Use additive blending to add light onto scene.

  1. Overlay bloom on top of scene.

I guess I’m confused about ‘darkening’ because I keep thinking in terms of a level that is by nature very dark, and then gets brightened by light. Is a better way to achieve this type of result just using textures that are inherently dark?

I’m still trying to read through your process flow; I’ll edit this post with my questions/thoughts when I’ve done so. Thanks for taking the time to do this.

EDIT: I missed the part when you would add your shadows, and I’m a bit confused as to why the shadows and lights are not part of the same texture.

You also say “capture bloom” and I assume this means to a different FBO than the scene. Can you elaborate a bit more on steps 3 and 4, and why you go through the entire process of drawing the surrounding geometry of the lights twice in your steps?

By capture bloom, I mean copy the result from 2a/2b to a texture for later use. This should probably be done via a FBO.

For the blur there’s lots of resources on the internet for this, but it basically involves rendering the unblurred texture to another texture via a blur shader.

You don’t have to draw the surrounding geometry again, I was assuming you were going for something like a regular forward renderer approach. Alternatively you can do a fullbright pass and use that instead, a bit like a deferred renderer.

Gotcha. I think I get it, kind of. I’m not used to FBOs and the flexibility and the power that they offer, so it’s hard for me to think in terms of anything other than what’s on the screen (even though we are using the deprecated copytex2d). Other than speed, are there any advantages to using FBOs? Is the way to achieve darkness to simply draw the lightmap on top of (0,0,0,0)?

Don’t know if this is what you asked about, but anyway:

Setup: Create 2 FBOs and attach 2 RGB textures. One will be the accumulation texture (where all brightness information is stored), and the other one is a light buffer.
For each light:
1. Bind light buffer FBO
2. Draw light
3. Draw shadows
4. Bind accumulation FBO
5. Draw light buffer texture (to accumulation FBO) using additive blending (GL_ONE, GL_ONE)
Finally:

  1. Bind backbuffer (FBO 0)
  2. Draw accumulation texture (to backbuffer) over game scene using the blend func(GL_ZERO, GL_SRC_COLOR).

That’s how I did it at least…
Sorry, Riven… I know I’m an optimizing bastard…

Basic tips:

  • Draw your light using GL_TRIANGLE_FAN. As this kind of lighting is extremely fill rate limited, having 18 vertices forming an approximated circle instead of 4 vertices forming an quad will save you a huge screen are of pixels.
  • Shadows tend to extend far outside the light’s area. Enable scissor testing around the light unless it covers the entire screen to quickly discard distant shadows to save a lot of fill rate.
  • Copying the whole light buffer to the accumulation texture is not necessary. Just keep the scissor test enabled when copying to only copy the relevant part.
  • Some (old) drivers are extremely slow on FBO switching. This lighting method requires 2 binds per light, quickly becoming a bottleneck. Instead of having 2 FBOs, keep a single FBO (but still 2 textures). Instead of binding an FBO, bind the needed texture to the current FBO. This is much faster on some computers (several times faster).
  • Don’t use immediate mode rendering (should be obvious as you’re drawing (lights*objects) shadows for each light).

More advanced stuff:

  • If you want to apply a bloom, use HDR rendering (16-bit floating point textures) for the light accumulation. Apply the bloom effect to the final lighted scene.
  • Keep multiple (4-16) light buffer textures. Draw a light to each of them and do the accumulation with single pass multitexturing, eliminating lots of texture binds (2 per light VS 1 per light + 1 every 4-16 lights).
  • Draw multiple non-overlapping lights to each light buffer, reducing texture binds and fillrate even further.

With all of these things implemented you’ll be able to have 1000+ lights with shadows all over the screen. The most limiting factor will be the size/radius/distance of your lights. If all your lights cover the whole screen you should definitely ignore the advanced stuff (except the HDR/Bloom stuff).

Thank you for your extremely thorough post.

[quote]For each light:
1. Bind light buffer FBO
2. Draw light
3. Draw shadows
4. Bind accumulation FBO
5. Draw light buffer texture (to accumulation FBO) using additive blending (GL_ONE, GL_ONE)
Finally:

  1. Bind backbuffer (FBO 0)
  2. Draw accumulation texture (to backbuffer) over game scene using the blend func(GL_ZERO, GL_SRC_COLOR).
    [/quote]
    The one thing I’m a bit confused about here. You say that I should do the first five steps for each light. Are you clearing the light buffer FBO each time you start drawing to it again, so that you are essentially handling each light and its shadows by itself, and then handing it to the accumulation buffer to be blended with the rest of the lights/shadows? I can get my head around that.

I’m also assuming that if I wanted my non-lit areas to be black, I’d use black as my clear color for my light buffer FBO and my accumulation FBO. If I wanted a very dim red ambient light before other lights were added, I’d clear with (.2,0,0), etc. etc. This makes a lot of sense.

The problem I have (and somewhat related, is blendFunc(GL_DST_COLOR,GL_ZERO) the same result as what you said?) is this:

If you’re using that particular blend function to blend your accumulation buffer into your scene, it is impossible to obtain a color value for the fragments of higher than one if you are using multiplicative blending, since we are not doing any sort of HDR in these steps. Is this correct? The result of this in our setup right now is that if we make the light in our screenshot in my first post any brighter, there are several places in which the fragment color is too bright to be blended into the scene at its true “light” value. Example, if we use .2 as our clear color for the light map, and have a light with a color intensity of 1f, a certain circle in the middle of the light’s area will be uniformly 1.0 because of the restrictions of multiplicative blending. Is bloom the only way to get around this and actually make the centers of lights actually BRIGHTEN the scene past their native texture color?

Yes, I clear it with (0, 0, 0, 0) for each light. Sorry, forgot that. The same for the accumulation buffer but each FRAME. For ambient light, clear the accumulation buffer with the ambient color.

Bloom will not solve the uniform circle in the middle of the light. Even if you use floating point render targets you will still have it clamped to 1 as your screen can only show 256 different shades of colors between 0.0 and 1.0. To get rid of that block in the middle you need use floating point render targets and tone mapping to map your color from HDR to a screen color. Tone mapping is a hacky way of “displaying” colors brighter than 1.0 by making the color shown on the screen non-linear. Basically you need a shader which takes the complete HDR backbuffer and applies a tone mapping function on each pixel in the fragment shader. The simplest one is this one:

toneMappedColor = color / (color + 1);

This will make the color actually displayed on the screen approach 1.0 as the actual HDR color approaches infinity. In other words, it will get closer to 1.0 but never actually reach it, ensuring that there is always a brighter color available.

Bloom is a way of presenting the HDR information better. In real life as your eyes’ lenses contain impurities and dust in the air also reflects a small amount of light, the brighter an object is the “larger” it will seem. Bloom is a way of simulating this effect in games by basically adding an image containing the brightest parts of the scene blurred on top of the scene. It just makes it look brighter by showing it more as we’d expect to see it in real life without actually increasing it’s brightness. To get a better blur and better performance you usually downsample this bloom texture. It’s also common to use more than one downsampled texture, for example one 1/2 sized, one 1/4, etc. I’d love to explain more on how to actually implement a bloom effect. ::slight_smile:

Sorry for the slow answer, got caught up in a ass slow League of Legends game. T_T

Does the rest of my last post make any sense? Again, thank everyone for all their help, I am learning a lot.