2D Lighting Tribulations with Shaders

Sorry, realized there was more than one line in your post. >> Never post on forums while your game loads… See my above post for better answers! ><

EDIT:
These might be interesting (they do almost nothing without HDR though…):

GL30.glClampColor(GL30.GL_CLAMP_VERTEX_COLOR, GL11.GL_FALSE);
GL30.glClampColor(GL30.GL_CLAMP_READ_COLOR, GL11.GL_FALSE);
GL30.glClampColor(GL30.GL_CLAMP_FRAGMENT_COLOR, GL11.GL_FALSE);

You’ve got me intrigued here. I’m assuming this is why most older 2D computer games or ones designed for compatibility don’t really implement this type of stuff (i.e. terraria).

We’re developing a side scrolling shooter like metal slug or contra, but including RPG elements like mass effect, with random items like diablo. So the desire to have some decent lighting stems from the fact that we aren’t going for Super Mario Brothers 2 here. The issue is ensuring compatibility with older GPUs so that all of our target gamer-audience can enjoy the title.

In the interest of curiosity though, and having advanced bloom for those users whose computers can handle it, I’d love to hear more about what you have to say, if you would actually “love” explaining it ;D Thanks again.

EDIT: A good example of the style of lighting we’re going for (possibly with more shadows than they have in some scenes) is COBALT by Oxeye game studios. I don’t know if you’ve seen this but you can youtube Cobalt and their action teaser is one of the first few links. Everything just looks so pretty and bright when they want it to, but it doesn’t overwhelm the scene. I’d just love to have a name for that “super brightness” that they achieve for bright lights, projectiles, and explosions, so that I could go around on forums asking questions and not sounding like an idiot because I can actually explain what I want.

WARNING - MONSTER NUKE POST INCOMING

I agree that HDR in a 2D game might be a little overkill, but it would look somewhat better, more accurate and believable. You would however limit yourself to slightly newer hardware (about 5 years old). For similar light effects as in Cobalt it would indeed look awesome.
However what Cobalt doing isn’t that close to what you are doing. Your lighting is much better. Their explosions are “just” a light texture and probably nothing calculated in shaders. No shadows or anything fancy. The bloom effect they achieve has nothing to do with brightness on the screen, it’s just how the light texture looks. Of course they also have smoke and debris particles, but that’s just to make it look like an actual explosion (nothing to do with the lighting).
With your lighting you could make a lot more awesome effects. I would LOVE to see that, so don’t take the short road! If you want the game to be playable on low-end hardware just add different graphics settings.

Low: no lighting at all (Intel shit don’t support FBOs)
Medium: basic LDR lighting
High: full HDR lighting with bloom and tone mapping

The only thing that changes is the lighting calculations and the use of a back buffer HDR texure, so this is completely transparent to the rest of the game. It should be easy to implement these graphics settings.

To implement bloom you need 2 floating point textures per bloom level. You’ll have to experiment with how many levels to use for the best result. To extract only the bright parts of the screen you should use a small shader that reduces the color slightly and then clamps it to 0 if it becomes negative (floating point textures, remember?). You’ll also need 2 blur shaders, one horizontal blur and one vertical blur. A separable gaussian blur is what I used, which gives a nice round blur.
The basic idea is to copy the back buffer texture to the first bloom texture using the brightness reducer. Then for a number of passes (1-3 or something) you ping pong between the bloom textures to blur the screen, first horizontally and then vertically. Then copy this blurred image to the next half as large bloom level and repeat. Finally we draw all blur levels (preferably using a multitexturing shader) to the back buffer using additive blending.
The difference between a good bloom and a bad bloom is shimmering. Shimmering easily appears as we’re reducing the resolution of the scene for the bloom. The difference between a good bloom effect (like in Mass Effect) and a bad bloom effect (like in Call of Duty 4+) is shimmering and aliasing/blockyness. The CoD one looks like complete crap.

Small note: When I say copy, I just mean a fullscreen pass to copy the texture.

For HDR rendering:

  • Keep a single frame buffer object, created during game initialization. You can attach textures to this FBO without having to bind different FBOs.
  • You need a single RGB FP16 texture to use as a back buffer. This is what you will render your scene to.
  • Keep 2 RGB FP16 textures for lighting (light buffer and accumulation).

For bloom:

  • Keep n bloom levels, starting at screen resolution and halving for each level.
  • You’ll need 2 RGB FP16 textures per bloom level at the bloom level’s resolution.

Scene rendering:

  1. Bind the FBO.
  2. Attach the back buffer texture to the FBO.
  3. Clear color buffer (HAHA, didn’t forget it this time!)
  4. Draw environment, sprites, whatever.

Lighting:
5. Attach accumulation texture to FBO.
6. Clear it with the ambient light color.
7. Enable scissor test.

  1. For each light:

    1. Attach light buffer texture to FBO.
    2. Clear it with black.
    3. Set glScissor so that the active renderable area encapsulates the light circle.
    4. Draw your light.
    5. Draw shadows.
    6. Attach accumulation texture to FBO.
    7. Enable additive blending and draw the light texture to the accumulation texture.
  2. Disable scissor test.

  3. Attach the back buffer texture to the FBO.

  4. Enable the (GL_ZERO, GL_SRC_COLOR) blend func and draw the accumulation texture to the backbuffer.

You now have a fully lit scene, which is in HDR. If you want some objects to be unaffected by lighting, now is the time to draw them. Otherwise, it’s time to apply bloom (though some do it after tone mapping for some stupid reason).

  1. For each bloom level:

    1. Attach the bloom level’s first texture to the FBO.
    2. If it’s the first bloom level: draw the back buffer to the bloom texture using the brightness reducer texture.
      Else: Downsample the previous bloom level.
    3. For each blur pass:
      1. Attach the second texture to the FBO.
      2. Draw the first texture to the second using a horizontal blur shader.
      3. Attach the first texture to the FBO.
      4. Draw the second texture to the first using a vertical blur shader.
  2. Draw all bloom levels using additive blending to the screen using a single pass multitexturing shader.

  3. Unbind the FBO (bind FBO 0).

  4. Draw the HDR back buffer to the LDR screen back buffer using a tone mapping shader.

  5. Draw the game UI directly to the screen back buffer.

  6. Enjoy another goddamn awesome frame of your game!

If you need actual code examples (I found floating point texture setup to be insanely cryptic and weird), just ask.

Another insanely long post by me. I need to get some sleep and/or a life.

I’ll check back in tomorrow…

Well I found one error with your long and insanely f*cking awesome post.

[quote]16. Draw the game UI directly to the screen back buffer.
16. Enjoy another goddamn awesome frame of your game!
[/quote]
Enjoy another goddamn awesome frame of your game! - Should be step 17.

But I jest. Seriously thank you, this is way more than I could ever ask for. The fact that you’re willing to provide example code is extremely generous, but please don’t write any from scratch if it takes awhile. We’ve had to figure out a lot of the other cryptic aspects of openGL as well, and we don’t really know anything about the implementation of FBO’s, MUCH less floating point textures.

The concept of “bloom levels” is still a bit funky to me, I guess this just means repeated applications of the blur using mipmaps of the texture, but I could be way off on that. I’m guessing that’s what you mean when you refer to downsampling.

I’m also a bit confused on how the lighting+scene process allows for HDR, is that one of the benefits of floating point textures?

Definitely get some sleep, you earned it. I’ll need tons of time to process this post in its entirety and begin my trek to understanding FBOs.

“You obtained ‘Sleep’.”

Copy-pasta fixed. I shouldn’t be posting while I was so tired, but you don’t seem to be complaining… :slight_smile:

FBOs are a little tricky to get working. To be honest I still haven’t figured out why you get the result on the texture upside down, but I think it’s because when rendering you have a the bottom left pixel as (0, 0) (or actually (-1, -1), but whatever). Textures seem to use top left, so you get the result upside down… I dunno. ???

Hehe, “bloom levels” was just a word I made up on the fly, and my explanation was… pretty bad I guess. xD I realize I wouldn’t understand it either. I’m gonna try this again. xD
The basic concept of bloom is that you just copy the parts that are brighter than a certain threshold of the scene to another floating point texture, blur it and then add it back to the original scene. However, using only a single blur pass will only give you a bloom that sticks out 2-3 pixels from the bright objects, regardless of how bright they are. You could increase the blur kernel size or do more than one blur pass, but this is not a good idea for two reasons: performance and “quality”. Performance wise, doing more texture lookups (for the blur kernel) or more fullscreen passes (2 per pass) is a really bad idea. Secondly the bloom doesn’t look very good even if you increase the blurriness. I just don’t think it looks as it should.
Instead of more expensive or more passes, we can use multiple resolutions of the blur. If we downsample the scene to half size (width/2, height/2), we can get double the blur at 1/4th the performance cost but also a very small hit to quality. This reduction in quality manifests as shimmering and sometimes blockyness if the downsampling is implemented badly. However it is possible to completely avoid this. Therefore it also makes sense to use even more smaller textures than only full size and half size. The performance hit gets smaller and smaller as the resolution gets smaller, so using more of them is basically free and increases the look of extremely bright objects a lot. These are what I called bloom levels. Like you said the layout is a little bit like mipmaps, but we will use them all later.

So we draw the scene to the first full-sized bloom level texture using a brightness threshold shader and blur it. We have our first level of bloom.
We then draw the first bloom level to the second level’s half sized texture and blur it. We have our second level of bloom.
Then we draw the second bloom level to the third level’s 1/4th sized texture and blur it. We have our third level of bloom.
Well, you see the pattern by now. Of course it doesn’t make sense to have too small textures (they will approach 1x1 xD), so you shouldn’t go below maybe 1/64 or 1/32, but you can just experiment later. Also note that you only need a single texture lookup when downsampling as you will get the average of 4 pixels for free thanks to bilinear filtering.

Finally we just add all these blurred bloom textures to the HDR scene again. This will actually increase the average brightness of the scene a lot, so you may want to reduce the brightness a little (perhaps 50% original scene, 50% bloom?). Again, just experiment. We then just do the tone mapping. I hope it’s clearer now.

The concept of FBOs is pretty simple. They are just a collection of color attachments (either textures or renderbuffers), a depth attachment (a z-buffer), a stencil attachment, etc. You’ll just want to use a single color attachment at a time (a floating point texture), and you don’t need a depth or stencil attachment.
Getting FBOs to work however is quite hard. All attachments have to have the same resolution, and only later DX9 hardware can render to floating point textures. Some combinations of attachments aren’t allowed either. Things get even more crazy if you want multisampling, but you’re doing a 2D game so we don’t need it.

HDR stands for High Dynamic Range, which means that we have a higher color resolution than we can actually display and need to “dynamically” compress it. The concept comes from the fact that our eyes don’t see twice as bright things as twice as “bright”. As we use 16-bit floating point textures we have better accuracy for low color values while still being able to display extremely bright values. For example, rounding errors can cause banding in normal rendering which is eliminated with floating point textures. I can show you some examples if you want.

I gotta go now. I’ll drop in again in like 6 hours or something. xD

Yeah… that clears it up a bit. Implementation is a whole other matter for me, right now I’m having trouble just converting our scene to use an FBO. Right now we draw a lightmap using copytex2d and save it as an opengl texture object, I haven’t gotten to converting this yet. I then create the framebuffer as follows:


ibuf = GLBuffers.newDirectIntBuffer(1);
gl.glGenFramebuffers(1, ibuf);
screenFBO = ibuf.get(0);
        
tbuf = GLBuffers.newDirectIntBuffer(1);
gl.glGenTextures(1, tbuf);
backbuffer = tbuf.get(0);
gl.glBindTexture(GL2.GL_TEXTURE_2D, backbuffer);    
gl.glTexImage2D(GL2.GL_TEXTURE_2D, 0, GL2.GL_RGBA8, 1440, 900, 0, GL2.GL_RGBA,     GL2.GL_UNSIGNED_BYTE, null);
        
gl.glFramebufferTexture2D(GL2.GL_FRAMEBUFFER, GL2.GL_COLOR_ATTACHMENT0, GL2.GL_TEXTURE_2D, backbuffer, 0);
        
int status = gl.glCheckFramebufferStatus(GL2.GL_FRAMEBUFFER);
System.out.println(status == GL2.GL_FRAMEBUFFER_COMPLETE);
        
gl.glBindFramebuffer(GL2.GL_FRAMEBUFFER, screenFBO);

This is in our scene’s render method, later we’ll actually encapsulate all of the references to the framebuffers as static instances in our GameWindow so that we can actually just set them up once when we initialize the window and simply make calls to them from our scene’s render to save performance by a lot. This is just for testing however. The framebuffer checks out as complete, and then I simply render my scene as normal. We use a viewport and GLUlookat in order to get things to draw at the right place, and render the scene’s images this way. At the end we just draw a quad over the scene with the lightmap texture and the blend mode (DST_COLOR, ZERO). Then I execute the following:


gl.glBindFramebuffer(GL2.GL_FRAMEBUFFER, 0);
        
gl.glBindTexture(GL2.GL_TEXTURE_2D, backbuffer);
gl.glGenerateMipmap(GL2.GL_TEXTURE_2D);
        
gl.glGenTextures(1, tbuf);
gl.glBindTexture(GL2.GL_TEXTURE_2D, backbuffer);
gl.glTexImage2D(GL2.GL_TEXTURE_2D, 0, GL2.GL_RGBA8,  1440, 9, 0, GL2.GL_RGBA, GL2.GL_UNSIGNED_BYTE, null);
gl.glTexParameterf(GL2.GL_TEXTURE_2D, GL2.GL_TEXTURE_WRAP_S, GL2.GL_CLAMP_TO_EDGE);
gl.glTexParameterf(GL2.GL_TEXTURE_2D, GL2.GL_TEXTURE_WRAP_T, GL2.GL_CLAMP_TO_EDGE);
gl.glTexParameteri(GL2.GL_TEXTURE_2D, GL2.GL_TEXTURE_MAG_FILTER, GL2.GL_LINEAR);
gl.glTexParameteri(GL2.GL_TEXTURE_2D, GL2.GL_TEXTURE_MIN_FILTER, GL2.GL_LINEAR_MIPMAP_LINEAR);
gl.glGenerateMipmap(GL2.GL_TEXTURE_2D);
        
gl.glBegin(GL2.GL_QUADS);
   gl.glTexCoord2d(0.0, 0.0);
   gl.glVertex2f(0,0); //bottom left
   gl.glTexCoord2d(1.0, 0.0);
   gl.glVertex2f(0,1440);  //bottom right
   gl.glTexCoord2d(1.0, 1.0);
   gl.glVertex2f(1440,900 );  //top right
   gl.glTexCoord2d(0.0, 1.0);
   gl.glVertex2f(0,900);  //top left
gl.glEnd();

This, I think, draws the contents of the frame buffer to the screen. It’s obviously doing something right, but something with how we’re rendering our scene is preventing it from being displayed along with the lightmap. It’s as though we had GL Blend disabled, but we don’t. The lightmap is simply all that’s being displayed at the end.

Wow, you’re using JOGL. I’m using LWJGL, so please don’t hate me if a GL11 or so slips by…

The reason I found framebuffers so tricky was that they wreak havoc on your viewport and matrices. I’m currently working on a small bloom implementation to use in my own future games using only OpenGL 3.0.
Well, you can only see your light map, then I guess the problem lies in your matrix settings for the scene rendering. Framebuffers don’t reset your viewport or your matrices, but they do interpret them differently if you have a different sized texture attached to the FBO. The easiest way to get it working is just to call glViewport directily after binding it, and also glLoadIdentity and setting up your matrices again. I don’t know if this will help though.

Oh, now I see. You forgot to bind the framebuffer. You’re checking the completeness status of the default backbuffer, which always returns GL_FRAMEBUFFER_COMPLETE of course. Before you attach your texture you have to call:

gl.glBindFramebuffer(GL2.GL_FRAMEBUFFER, screenFBO);

Hehe. Let me just tell you a story about my battle against textures a few weeks ago. I trying to get 2D texture arrays working, but couldn’t get it to display on the screen no matter what. Turns out I forgot to bind the texture before uploading it, resulting in the texture being unloaded and silently returned black. Same thing for you but for framebuffers. ;D

Yes we’re using JOGL. We started out with LWJGL before we knew anything about openGL and decided it was over our heads and moved to java2D. Eventually we learned that using openGL was inevitable, and the first thing we found when we googled “Java OPENGL” was obviously JOGL. We were ignorant to the fact that LWJGL did it all for us to begin with. Hopefully won’t cause too many problems down the road, but JOGL so far is fine.

I’m wondering where that little code snippet should be placed. Sorry for the weird naming, I called my frame buffer int ‘backbuffer’ since I’m basically drawing everything in the scene to it, even though the backbuffer is actually the screen, right?

Tried resetting the modelview right after binding, not sure if I’m binding at the wrong time or what. In order to correctly use the game coordinates we usually use this:


gl.glMatrixMode(GL2.GL_MODELVIEW);
gl.glLoadIdentity();
glu.gluLookAt(viewport.getxPosition() * .00, viewport.getBottomLeftCoordinate().y * .00, 1, viewport.getxPosition() * .00, viewport.getBottomLeftCoordinate().y * .00, 0, 0, 1, 0);
       

We don’t really use glViewport anymore, with this code present when we want to “reset to the correct place”, it just works. Except now. ^^

EDIT: I feel like the thing we are doing wrong is not correctly drawing our scene textures to the frame buffer. There must be some code in between the “beginning” and “end” to correctly bind the texture before drawing it that previously we didn’t have to do, that is working for the lightmap somehow. I got the impression, though, that when you bind a framebuffer you can just draw to it as though it were the screen.

You generated your framebuffer, but you didn’t bind it! Directly after

gl.glGenFramebuffers(1, ibuf);

you also need to bind it with glBindFramebuffer. Your FBO setup code is doing nothing!

The backbuffer is actually what you render to if you don’t use any FBOs. However, I think it’s fine calling a substitute for this a “backbuffer” too, as you use it as one, but remember the difference between an FBO and an attachment! An FBO is nothing more than a container. The actual “backbuffer” would be the texture attached to it.

Gotcha. I have this in the setup now:


        ibuf = GLBuffers.newDirectIntBuffer(1);
        gl.glGenFramebuffers(1, ibuf);
        sceneFBO = ibuf.get(0);
        gl.glBindFramebuffer(GL2.GL_FRAMEBUFFER, sceneFBO);

Which should make this the active frame buffer that I’m rendering to. I think something with the coordinate system is what’s messing this up. When we render our light texture, which we create using the old school method, we do more or less the same steps that we do for rendering our entities, except the quad for the lightmap is full screen and the same size as the frame buffer texture.

Assuming it has something to do with the coordinate system, the second half of the code I posted before still confuses me, particularly the part before GL QUADS:


        gl.glBindFramebuffer(GL2.GL_FRAMEBUFFER, 0);
        
        gl.glBindTexture(GL2.GL_TEXTURE_2D, sceneImg);
        gl.glGenerateMipmap(GL2.GL_TEXTURE_2D);
        
        gl.glGenTextures(1, tbuf);
        gl.glBindTexture(GL2.GL_TEXTURE_2D, sceneImg);
        gl.glTexImage2D(GL2.GL_TEXTURE_2D, 0, GL2.GL_RGBA8,  1440, 0, 0, GL2.GL_RGBA, GL2.GL_UNSIGNED_BYTE, null);
        gl.glTexParameterf(GL2.GL_TEXTURE_2D, GL2.GL_TEXTURE_WRAP_S, GL2.GL_CLAMP_TO_EDGE);
        gl.glTexParameterf(GL2.GL_TEXTURE_2D, GL2.GL_TEXTURE_WRAP_T, GL2.GL_CLAMP_TO_EDGE);
        gl.glTexParameteri(GL2.GL_TEXTURE_2D, GL2.GL_TEXTURE_MAG_FILTER, GL2.GL_LINEAR);
        gl.glTexParameteri(GL2.GL_TEXTURE_2D, GL2.GL_TEXTURE_MIN_FILTER, GL2.GL_LINEAR_MIPMAP_LINEAR);
        gl.glGenerateMipmap(GL2.GL_TEXTURE_2D);

There seem to be way too many calls to bindtextures… generate mipmap… etc.

ibuf is the ID of our framebuffer, and tbuf is the ID of the scene texture “image buffer” I guess.

Uh, why are you generating mipmaps for a un-initialized texture which contains random data?

For your backbuffer, you don’t need mipmaps. You wont be using the lower levels anyway as you’ll just copy the backbuffer texture to the real backbuffer.
Some code to setup your backbuffer:

//Texture
IntBuffer id = BufferUtils.createIntBuffer(1);
GL11.glGenTextures(id);
textureID = id.get(0);
GL11.glBindTexture(GL11.GL_TEXTURE_2D, textureID);

GL11.glTexParameteri(GL11.GL_TEXTURE_2D, GL11.GL_TEXTURE_MIN_FILTER, GL11.GL_LINEAR);
GL11.glTexParameteri(GL11.GL_TEXTURE_2D, GL11.GL_TEXTURE_MAG_FILTER, GL11.GL_LINEAR);

GL11.glTexImage2D(GL11.GL_TEXTURE_2D, 0, GL11.GL_RGB, width, height, 0, GL11.GL_RGB, GL11.GL_UNSIGNED_BYTE, (ByteBuffer) null);

//FBO
IntBuffer id = BufferUtils.createIntBuffer(1);
GL30.glGenFramebuffers(id);
fboID = id.get(0);

GL30.glBindFramebuffer(GL30.GL_FRAMEBUFFER, fboID);
GL30.glFramebufferTexture2D(GL30.GL_FRAMEBUFFER, GL30.GL_COLOR_ATTACHMENT0, GL11.GL_TEXTURE_2D, textureID, 0);

I also recommend creating a bind function that also sets the viewport, as all rendering explodes funnily if you have a different sized FBO bound and didn’t change the viewport.

public void bind(){
    GL30.glBindFramebuffer(GL30.GL_FRAMEBUFFER, fboID);
    GL11.glViewport(0, 0, texture.getWidth(), texture.getHeight());
}

Thanks, I’ll fiddle with this a bit later.

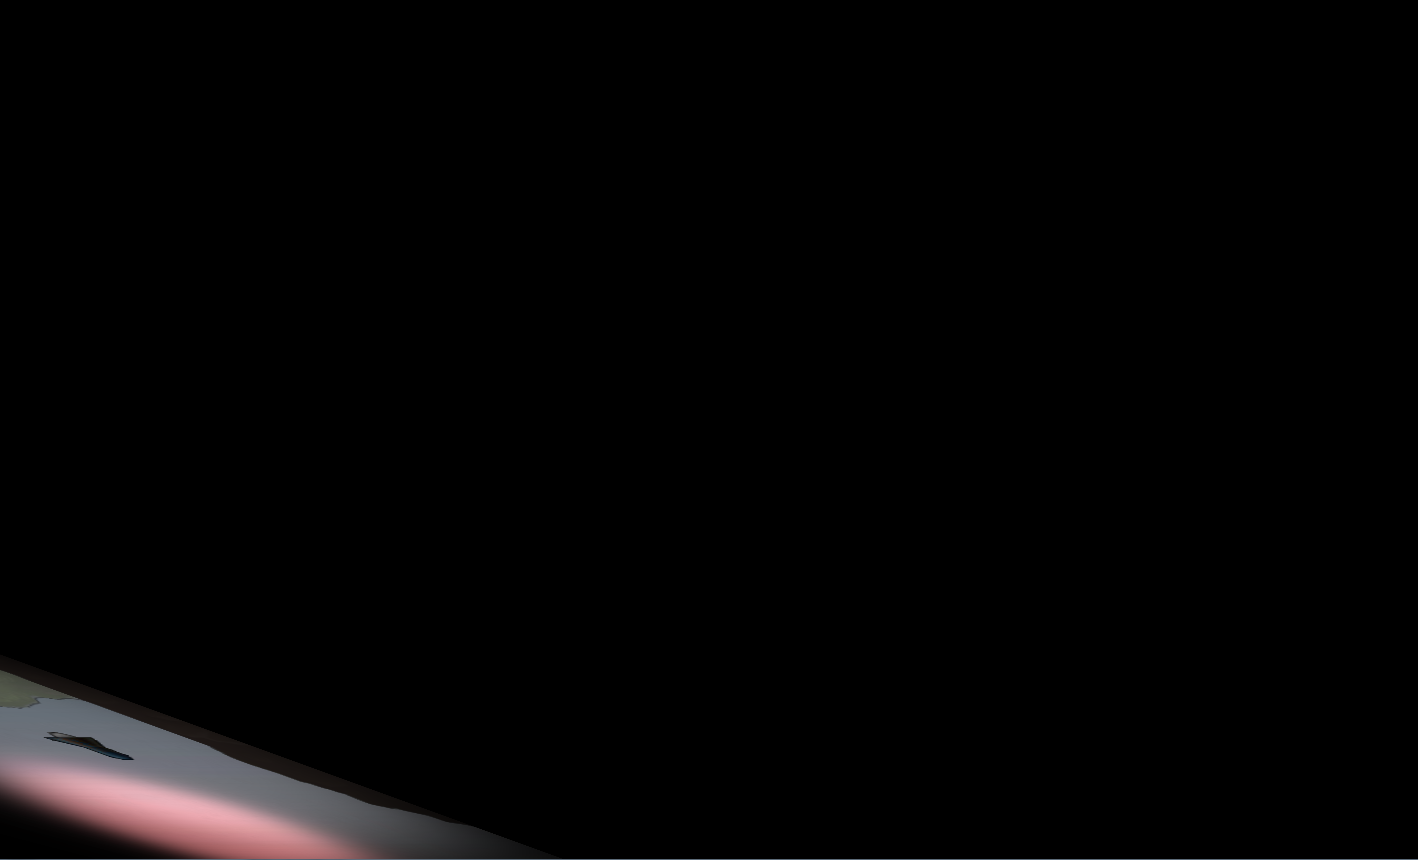
EDIT: So, we have this:

Which is an improvement over a few hours ago. I’m pretty sure this is related to how we are setting our viewport before we draw the scene. More specifically we don’t use glViewport anymore, we use gluLookAt to get the cursor to the right position before rendering our sprites. So I’m assuming somewhere along the way we are missing a step. However this is better than nothing. It also lags to hell after a few seconds ,I’m sure this is because I haven’t made an “init” feature in our gamewindow and am doing all the FBO calls every frame, but right now my main interest is getting a normal render.

For reference the final code which dumps the FBO texture to the screen:


        gl.glPopAttrib(); // Restore our glEnable and glViewport states 
        gl.glBindFramebuffer(GL2.GL_FRAMEBUFFER, 0); // Unbind our texture 
      
        gl.glEnable(GL2.GL_TEXTURE_2D);
        gl.glClearColor(0, 0, 0, 1.0f);
        gl.glClear(GL2.GL_COLOR_BUFFER_BIT);
        gl.glMatrixMode(GL2.GL_MODELVIEW);
        gl.glLoadIdentity();
        gl.glViewport(0, 0, OpenGLGameWindow.screenDimension.width, OpenGLGameWindow.screenDimension.height);
        glu.gluLookAt(viewport.getxPosition(), viewport.getBottomLeftCoordinate().y, 1, viewport.getxPosition(), viewport.getBottomLeftCoordinate().y, 0, 0, 1, 0);    
        gl.glBindTexture(GL2.GL_TEXTURE_2D, fbo_texture);
        
        gl.glBegin(GL2.GL_QUADS);
            gl.glTexCoord2d(0.0, 0.0);
            gl.glVertex2f(0,0); //bottom left
            gl.glTexCoord2d(1.0, 0.0);
            gl.glVertex2f(0,1440);  //bottom right
            gl.glTexCoord2d(1.0, 1.0);
            gl.glVertex2f(1440,900);  //top right
            gl.glTexCoord2d(0.0, 1.0);
            gl.glVertex2f(0,900);  //top left
        gl.glEnd();
        
        gl.glBindTexture(GL2.GL_TEXTURE_2D, 0);
        gl.glDeleteFramebuffers(1, fbo_intbuffer);
        gl.glDeleteFramebuffers(1, fbo_tex_intbuffer);
        
        gl.glFlush();

It just feels like too much to me, but something tells me that’s wrong. I know a lot of the problem with this distortion has to do with this section of the code, but nothing I change makes any logical sense.

I was also intrigued by this bit:


public void bind(){
    GL30.glBindFramebuffer(GL30.GL_FRAMEBUFFER, fboID);
    GL11.glViewport(0, 0, texture.getWidth(), texture.getHeight());
}

Would you do this before rendering ANY texture to the FBO (sprites, backgrounds, etc.)? If you bind the framebuffer once before going through your sprite rendering loop, you wouldn’t really need to call the first line every time… I think.

Like I said, FBO’s are tricky int (EPIC TYPO) this way. I recommend that you make a small FBO test program instead of trying to integrate it into your game. Do a very simple test which binds an FBO, renders a triangle or something to it, then binds the FBO’s texture and draws it to the screen. If you get that working, you’ll probably get a hang of it.

About the viewport stuff: Just remember to set the viewport to correct values if you change the resolution of whatever you’re rendering too. What you’re doing right now is fine I guess. I’m a little bit skeptical to using a gluLookAt for a 2D game. Wouldn’t a simple glTranslate and maybe a glScale be much less error prone? Also you do know what glOrtho is, right?

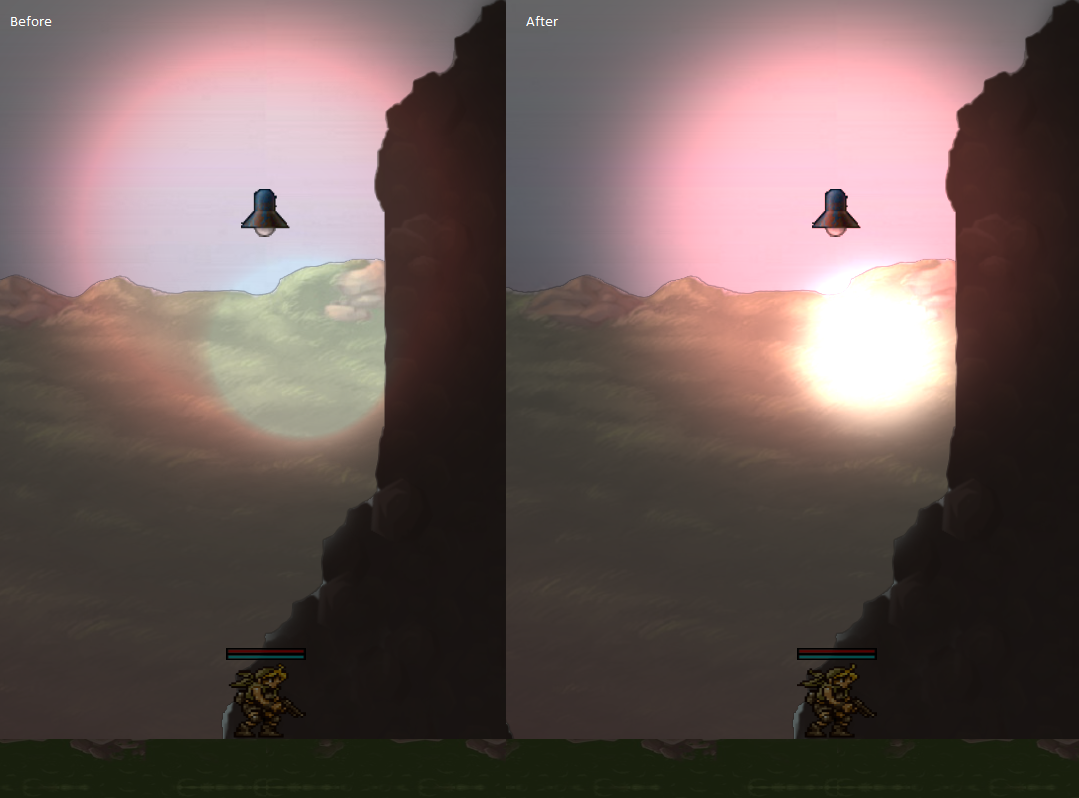
I kind of got carried away and implemented a HDR bloom effect myself. Results:

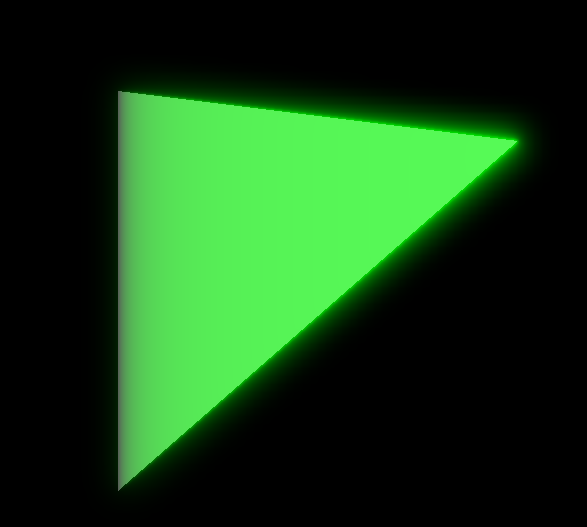
The color of the vertices in RGB are: (1, 1, 1) for the 2 left ones, and (1, pretty high 100ish, 1).

There are a few things that I’ve realized from implementing this.

This is an art. Bloom doesn’t really exist IRL, so what we call the bloom effect is just something that we think look better, so there is no right or wrong.
What tone mapping function you use affects the bloom experience a LOT. Tone mapping functions are however more art than science too. This means that you should decide on a tone mapping function FIRST, THEN experiment with bloom settings.

The performance of my implementation is… disappointing. I used 4 levels of bloom in this one, with a 7x7 gaussian blur. I used HDR textures for all rendering of course. Without bloom, the time for one frame is about 0.87 milliseconds, but with this in my opinion small bloom, it takes 5.71. That’s almost 4 ms just for a post process. If use 7 levels I get 6.42ms. I can see a number of reasons for this low performance.

(EDIT: This was at a resolution of 1600x900.)

  • I’m on a laptop. My GTX 460m isn’t exactly top of the line, but it isn’t exactly weak either. Desktops should have a lot better performance.
  • My card doesn’t get “hot”, it only goes to about 70c. It’s obviously very texture limited. It should be, it’s 16 bits per channel, and it sure is a lot of lookups.
  • For the that reason, ATI cards should perform better as they have more texture performance (I think?).

If you want to test it, I’ll try to hack up a stand-alone test. Would be interesting to know your specs, too.

We have a viewport class that moves with the player and tries to represent what we should see to aid in converting game world coordinates to what openGL needs. Before we would translate in the negative of where the viewport was, and then translate in the positive to the world coordindates of the thing we were trying to render. This felt kind of weird so we abandoned that approach and now use LookAt? I’m not really sure, I have to talk to my partner about it, but I swear I’ve never really seen that used in 2D examples either. I don’t really know why it should be causing a problem but I’ll do what you suggested and try to make a little sandbox where I can figure out what is actually going on here.

I’ll try to keep code coming but it might help to see your triangle example at least the simple HDR+triangle part, I don’t really need to see shaders and such.

Thanks as always.

I’m pretty sure glViewport actually sets what part of the window you want to draw to. This is useful for rendering split-screen games. You seem to have gotten it right in the code though. :wink: Your gluLookAt would (probably) just be equal to glTranslate(playerX - screenWidth/2, playerY - screenHeight/2). Also when doing fullscreen passes, it’s easier to just not use the matrices at all. Just load identity on all of them and send in the vertex coordinates as -1 to 1. It’ll minimize these errors.
About the triangle example, what part are you interested in? I’m basically just drawing to an HDR texture attached to an FBO and then copying it with tone mapping to the backbuffer.

I’m not sure. I think I need to just play with a sandbox for awhile and see exactly why the image first of all seems to be drawing as a triangle, and upside down (you mentioned something about that awhile back)

Shameless double post:

So the HDR worked. We figured everything out with the FBOs and are now using RGBA16F for the three textures (originally we forgot and used RGBA16 and it didn’t work, the F for floating point is key). We calculate the int ID’s for each of the different FBO elements (1 fbo, 3 textures) and store them as public static values in our game window so we can access them when needed.

Next up is shadows, and then finally a bloom shader.

An aside, we noticed that there is a distinct “ring” of color near the edge of our light. Awhile back in the thread I posted our shader that draws the light, I’m not sure if this is at fault but we suspect that it must be. It just feels like the light should make a “smoother” transition. Maybe it’s because the red component of the color gets maxed out. We’ll do research.

Nice! That ringing is a little concerning though…
Are you using tone mapping when you finally copy the HDR backbuffer to the screen backbuffer? You shouldn’t get any rings like that at all if you use proper tone mapping as you won’t get (for example) a clamped red channel.
It might also be OpenGL clamping the color value you’re supply and the ones it calculates in shaders. You need to disable this, or you won’t really get much from the increased precision in the backbuffer.

Try to add this after creating your Display:

GL30.glClampColor(GL30.GL_CLAMP_VERTEX_COLOR, GL11.GL_FALSE); //Disables clamping of glColor
GL30.glClampColor(GL30.GL_CLAMP_READ_COLOR, GL11.GL_FALSE); //Kind of unnecessary but whatever
GL30.glClampColor(GL30.GL_CLAMP_FRAGMENT_COLOR, GL11.GL_FALSE); //Disables clamping of the fragment color output from fragment shaders

If you’ve already done all these, you could just try to use a different tone mapper. There are lots and LOTS of articles around with code for different tone mappers and their pros and cons.

Such as in the init method of our game window? Or is once before the first render pass at any time sufficient?

EDIT: Adding these didn’t seem to make a difference so that clearly wasn’t the problem. I’m trying to do some research on how we’d implement tone mapping. It looks to me like a lot of people do it through a shader when they finally render their backbuffer texture to the screen…? I’ll post when I know more.

EDIT2: Found this… example of some fragment shaders that use tone mapping equations when they pass the final image to the screen: http://portfolio.kajon.se/Ibr/RealtimeTonemapper_rapport.pdf

EDIT3: Also this PDF transporter-game.googlecode.com/files/HDRRenderingInOpenGL.pdf Contains a weird tone mapping param at the end.

My thing with tone mapping is, for example your function color / color + 1, won’t this make the dark areas of the screen much darker than we want them to be?

You’re correct about applying tone mapping during the final copying to the back buffer. Like I said earlier, HDR doesn’t solve much if you don’t use tone mapping. Just do it in a fragment shader.
The dark parts won’t get much darker. Just calculate a few values in your head:

Color -> Calculation -> Tone mapped color
0.0 -> 0.0 / 1.0 -> 0.0
0.5 -> 0.5 / 1.5 -> 0.33333
1.0 -> 1.0 / 2.0 -> 0.5
2.0 -> 2.0 / 3.0 -> 0.66666
4.0 -> 4.0 / 5.0 -> 0.8

If the value is small, it will not become very much smaller.

Here is a template tone mapping shader. It’s using GLSL 3.30, but you should easily be able to figure out how to convert it to any GLSL version (fragColor -> gl_FragColor, texCoords -> gl_TexCoord[0], etc).

uniform sampler2D sampler;

in vec2 texCoords;

out vec4 fragColor;

void main(){
    vec4 color = texture2D(sampler, texCoords);

    //Insert any tone mapping function here.
    fragColor = color / (color + 1);
}

Here is the function I thought looked the best for what I was doing. You can try it if you want to. It’s not even close to as simple as the above one though.

uniform sampler2D sampler;

in vec2 texCoords;

out vec4 fragColor;

const vec3 power = vec3(1/2.2, 1/2.2, 1/2.2);

void main(){
    vec3 color = texture2D(sampler, texCoords).rgb;
    color *= 0.1;  // Hardcoded Exposure Adjustment
    color = color/(1+color);
    fragColor = vec4(pow(color, power), 1);
}

(I’ve removed some stuff from the code (#version and #include, and some layout() lines) as they are only meant for higher GLSL versions. Would probably be a too much to start with that too. xD Just note that the above code wouldn’t work copy-pasted.)