Hey JGO, before I start this post I’d like to say that this post and the snippets are open to criticism :D.
I’m not too sure if many people are familiar with this, so I figured I’d post it here. 
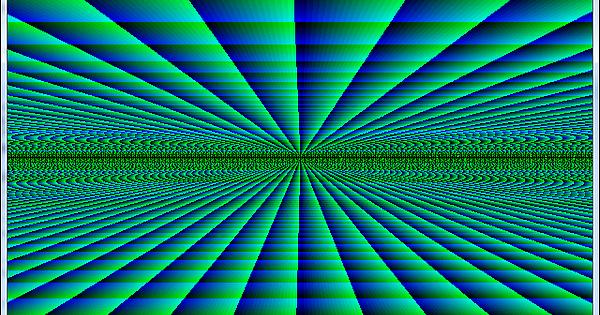
The effects this code will produce vary, so I will post the screenshots at the end of this post.
Requirements:
Knowledge of copy & paste.
Basic Window setup.
Canvas / JPanel setup.
Basic game loop setup for updating and rendering.
Assuming that you’ve:
A: Created a Window (JFrame), and added a Canvas (Or JPanel) to it.
B: Implemented a basic game loop that covers updating and repainting the drawing area.
Lets continue. 
Somewhere in your application you’ll need to declare these variables:
(They will be needed to create a Array[] of pixels and render them)
private static final int ALPHA = 0xFF000000; // Same as: -16777216
private Graphics graphics;
private int pixels[];
private Image img;
private MemoryImageSource mis;
private int width, height;
In your application you’ll need to initialize the variables above like so:
(Preferably in the constructor)
width = getSize().width; // Obtain your Windows width.
height = getSize().height; // Obtain your Windows height.
pixels = new int[width * height];
for (int i = 0; i < width * height; i++) {
	pixels[i] = ALPHA + (int) (Math.random() * 256 * 256 * 256); // Initialize the pixels so they're visible.
}
mis = new MemoryImageSource(width, height, pixels, 0, width);
mis.setAnimated(true);
img = createImage(mis); // Create the Image via your Window.
graphics = getGraphics(); // Obtain the Graphics via your Window.
Now that we’ve initialized all of our variables, you’re free to start your game loop and add the following to your render method to draw the pixels:
graphics.drawImage(img, 0, 0, null);
If you were to run the above it should produce the following:
(If you want the pixels to constantly change, just add the pixel initialization code before your draw the Image and call: mis.newPixels())
If you want to compare your setup with how it should be, see the completed class here:
http://pastebin.java-gaming.org/8ccfc5f963d
Now we get to the fun part  transforming 2D pixels into what seems to be 3D.
Above the call to ‘mis.newPixels()’ and ‘graphics.drawImage()’ add the following, we’ll perform the transformation to 3D:
(Coincidentally we’ll also be implementing variables to control the left/right rotation and position of the ‘3D Camera’ :D)
					/* Begin the transformation to 3D */
					double ceilingPosition = 8.0;
					double floorPosition = 8.0;
					double cameraYPosition = 1.0;
					double up = 1.0;
					double rotation = 0.0;
					double cosine = Math.cos(rotation);
					double sine = Math.sin(rotation);
					double forward = 0.0;
					double right = 0.0;
					int ceil = 0;
					for (int y = 0; y < height; y++) {
						if (y < 0 || y >= height) continue;

						double ceiling = (y + -height / 2.0) / height;
						double z = (floorPosition + cameraYPosition + up) / ceiling;
						if (ceiling < 0) {
							z = (ceilingPosition - cameraYPosition - up) / -ceiling;
							ceil = 1;
						}
						for (int x = 0; x < width; x++) {
							if (x < 0 || x >= width) continue;

							double depth = (x - width / 2.0) / height;
							depth *= z;
							double xx = depth * cosine + z * sine;
							double yy = z * cosine - depth * sine;
							int xPix = (int) ((xx + right) * 4);
							int yPix = (int) ((yy + forward) * 4);

							/* Apply the transformation to the pixels */
							pixels[x + y * width] = ALPHA +  ((xPix & 15) * 16) | ((yPix & 15) * 16) << 8;
						}
					}
If everything was done correctly you should see the following:
(Looks like 3D Space hmm?)
Result before applying depth transformation:
Various results from manipulating pixels:
(Rotation is active in some screenshots, thus the angle looks different)


If you’d like to compare your end result with the complete class see here:
http://pastebin.java-gaming.org/ccfcf669d32
Notes:
There is more than one way to do this, in this example I chose to use the MemoryImageSource over BufferedImage. (Reason why alpha is not just 0xff)
It is possible to create simple 3D objects and render them. (Walls, boxes etc, basic geometry)
In the example, Thread.sleep is not implemented, just realized that.
It is possible to apply textures, created this as an example:
Well, thanks for reading guys.
This post should be enough to get someone started on manipulating 2D into 3D.
Looking forward to some feedback, have a nice day.


