
Hi!
Today I’ll tell you how to draw a simple 2D bridge for a videogame.
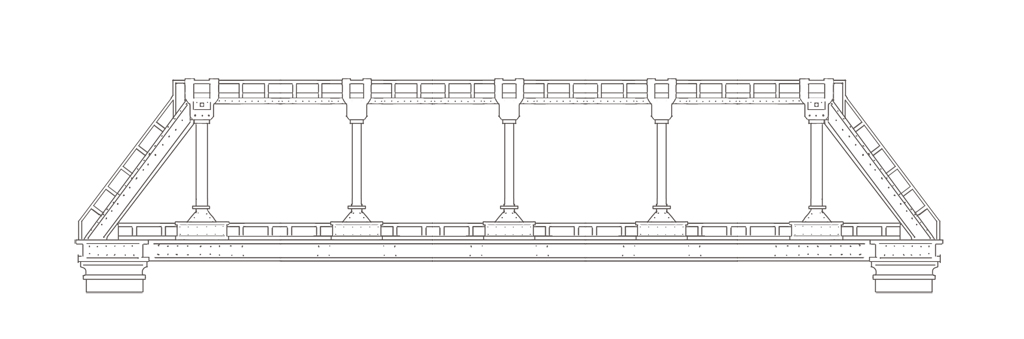
Firstly you need to make a few simple sketches like these:
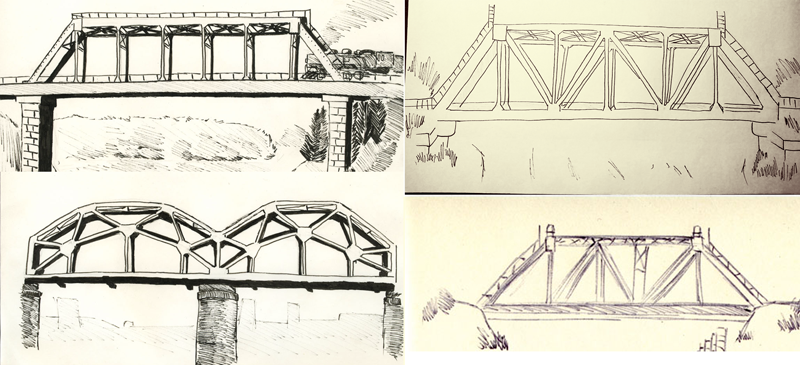
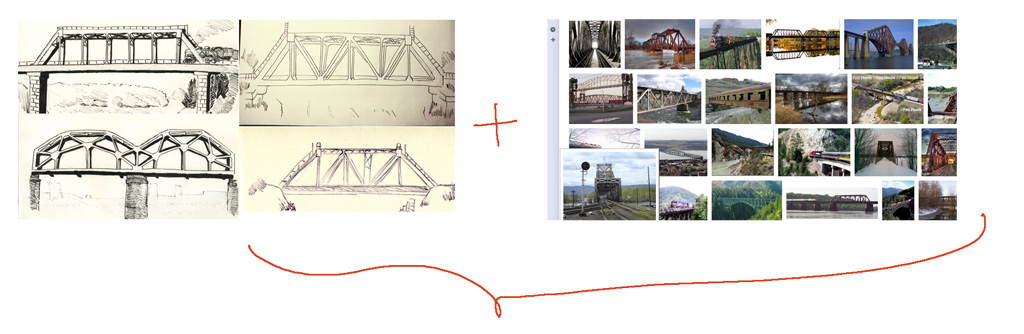
The main point of the sketches is to provide us a chance to think about the details of our bridge, like: fasteners, screws, couplings, fences, torches and so on. Such details attract a lot of attention of a human brain, so it gets bored when it can’t find them on your picture. We can effectively enrich our sketch with details from Google Image Search and then draw sections of out bridge:
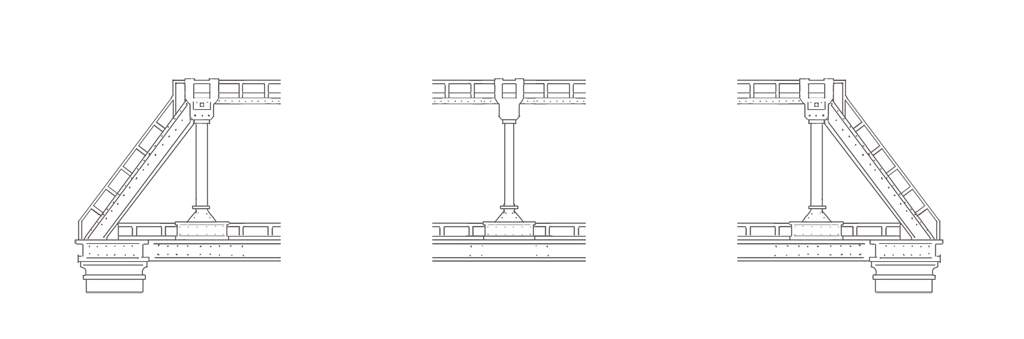
Firstly we draw the left side, then copy it and flip to get the right side. Generally it is a bad idea to copy stuff, but in our example as long as we are doing a simple object (bridge) we can allow it. Second, we draw the middle section. Keep it symmetrical, because we plan to duplicate it for creating bridges of a different length.
In this example you don’t really need the digital tablet. You can just use your mouse and the Shift-key. Press Shift to draw straight lines (dragging the mouse), or to connect two clicks with a straight line (there are people who don’t know about this feature).
Drawing each step we should save our intermediate results by making mini-backups. Later we can use them in case we mess up, or reuse it for other drawings. To make the mini back-up drag all your layers in the “folder”-button and then drag the folder in the “new layer”-button. Here is the duplicated stuff:
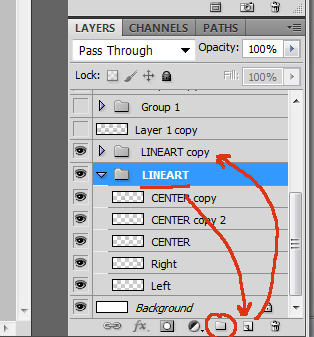
Now we should block original folder using the “black-lock” and make the folder invisible to protect it. Then we use the duplicate folders content to build a 4-sections instance of our bridge:
Don’t forget to mini-backup it too. Also you can save your drawing in a separate files when you work on something huge like the game level I was showing you last time. That level is a picture 14000 pixels wide, I saved every few hours in a separate file calling it something like public_demo_level_0047.psd and uploaded to DropBox.
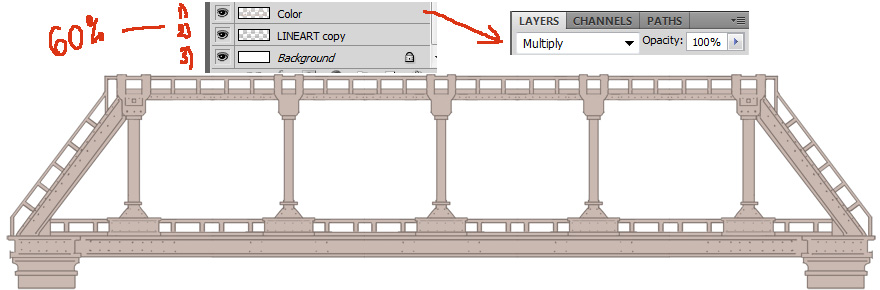
Now coloring. We need 3 layers (I list them down- up):
3) White background
2) Lineart – with opacity 60%
- and a layer (called “color”) in the “Multiply” mode.
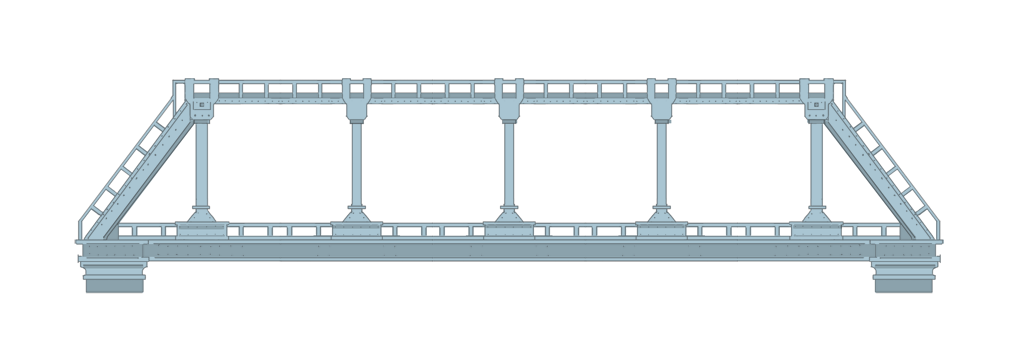
Two lower layers we block (using black locks) and the “color”-layer we paint with any neutral color:
Press Ctrl+U, play some time with hue and saturation, then add some volume by drawing shadows:
Now you can play a bit using texture brushes:
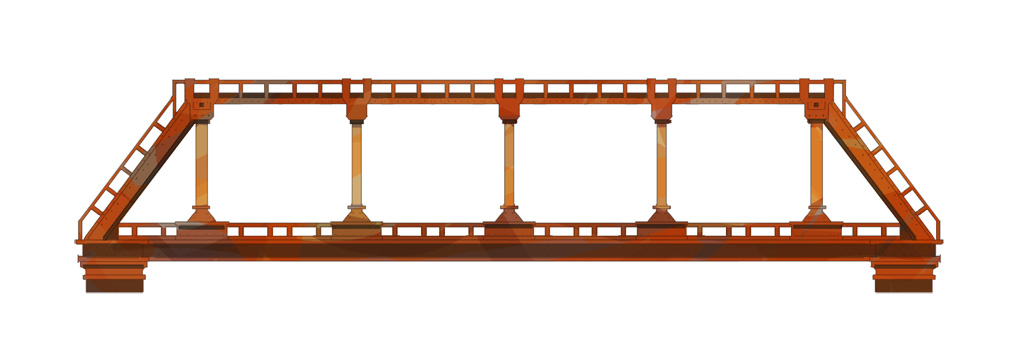
That’s it. Here we are.
Looks quite simple because we are drawing just a simple bridge, there is nothing special about it 
(Here is the same tutorial but with bigger images: http://jfix.by/2012/11/24/how-to-2d-bridge/)